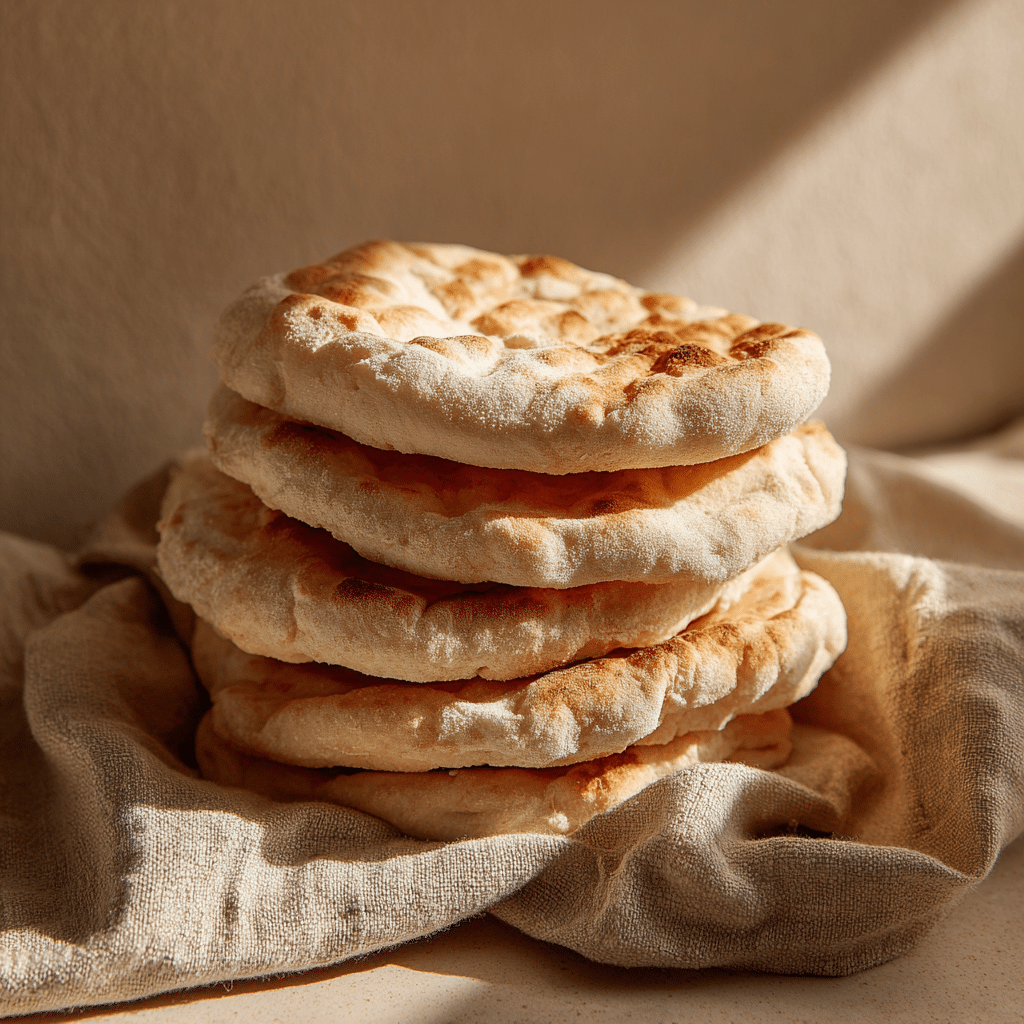
Pita Bread (Middle East) Recipe
Pita Bread (Middle East) is a timeless culinary treasure that perfectly blends simplicity and delightful texture, capturing the essence of Middle Eastern home kitchens. This pocket-style bread puffs up beautifully in the oven, revealing its soft, tender inside surrounded by a slightly crisp, golden exterior. Making it from scratch at home is an incredibly rewarding experience—it’s straightforward, quick, and results in bread that feels fresh and wholesome. Whether you’re looking to embrace an authentic taste of the Middle East or simply want a versatile bread for dips, sandwiches, or wraps, this recipe brings that iconic pita magic right to your countertop with just a handful of essential ingredients.

Ingredients You’ll Need
This recipe calls for just a few simple ingredients, each playing a vital role in creating the perfect pita bread. From flour’s structure-forming power to yeast’s gentle lift and sugar’s hint of sweetness, every component contributes to the final texture, flavor, and puffiness of the bread.
- 2 cups flour: Forms the sturdy yet soft base for the bread’s chewy texture.
- 1 tsp yeast: Creates the airy bubbles that make the pita puff up nicely.
- 1 tsp sugar: Feeds the yeast and adds a subtle sweetness.
- ½ tsp salt: Enhances flavor and balances the dough’s taste.
- ¾ cup warm water: Activates the yeast and brings the dough together into a soft ball.
How to Make Pita Bread (Middle East)
Step 1: Prepare the Dough
Start by activating the yeast in the warm water. Combine the yeast, sugar, and the warm water, and give it a gentle stir. Allow it to sit for a few minutes until it becomes frothy—this signals that the yeast is alive and kicking. In a large bowl, mix the flour and salt. Slowly pour in the yeast mixture and stir until everything comes together into a rough dough.
Step 2: Knead the Dough
Transfer the dough onto a clean, floured surface and knead it for about 8 to 10 minutes. This step is key to developing gluten, the protein that makes the pita soft yet elastic. The dough should become smooth and slightly tacky but not sticky.
Step 3: Let the Dough Rise
Place the kneaded dough in a lightly oiled bowl, covering it with a damp towel or plastic wrap. Allow it to rise in a warm, draft-free spot for about 1 hour or until it doubles in size. This resting phase is when the bread develops flavors and gains that airy texture.
Step 4: Shape the Pitas
Once the dough has risen, punch it down gently to release the trapped air. Divide it into 8 even pieces. Roll each piece into a smooth ball then flatten into rounds approximately ¼-inch thick. Keeping the rounds uniform ensures they cook evenly and puff consistently.
Step 5: Bake to Perfection
Preheat your oven to 230°C (450°F), placing a baking sheet or stone inside to heat thoroughly. Carefully place the rolled-out dough rounds onto the hot surface and bake for about 8 minutes. You’ll notice them puff up dramatically — that’s the signature pocket forming! The outside will turn slightly crisp and golden while the inside stays soft and airy.
How to Serve Pita Bread (Middle East)

Garnishes
Pita Bread (Middle East) comes alive with the right garnishes. Sprinkle fresh za’atar spice blend or a drizzle of olive oil right after baking for an aromatic finish. A sprinkle of sesame or nigella seeds before baking can add a pleasant crunch and visual appeal too.
Side Dishes
Whether you’re enjoying pita as a standalone bread or as part of a wider meal, it pairs wonderfully with classic Middle Eastern dips like hummus, baba ganoush, or tzatziki. You can also serve it alongside grilled meats, falafel, or a fresh salad to complete a vibrant plate.
Creative Ways to Present
Instead of just tearing it apart casually, stuff pita pockets with seasoned roasted vegetables, spiced meats, or fresh falafel balls with crunchy slaws for a portable and satisfying meal. Or cut it into triangles, toast them lightly, and serve as warm chips alongside dips for an irresistible snack or appetizer.
Make Ahead and Storage
Storing Leftovers
Once your pita breads have cooled, store them in an airtight bag or container at room temperature if you plan to use them within a day or two. This keeps the bread soft and ready to be warmed or eaten cold.
Freezing
For longer storage, pita breads freeze beautifully. Place parchment paper between each to prevent sticking and seal them airtight in a freezer bag. This helps keep their moisture intact so they thaw soft and pliable.
Reheating
Reheat pita bread gently by wrapping it in foil and placing it in a warm oven for a few minutes or popping it in between a hot skillet or toaster oven. This brings back that fresh-baked softness along with a hint of crispness on the edges.
FAQs
What type of flour is best for Pita Bread (Middle East)?
All-purpose flour works wonderfully in this recipe, giving a soft yet chewy texture. For a bit more chew, you can experiment with bread flour which has higher gluten content, but all-purpose flour remains the classic choice.
Why does my pita bread not puff up?
If your pitas aren’t puffing, it could be due to dough thickness, oven temperature, or yeast activity. Make sure to roll the dough thin enough and bake it on a very hot surface. Also, ensure your yeast is fresh and activated properly for that perfect pocket.
Can I make pita bread without yeast?
Traditional pita relies on yeast for its signature puff and texture. Without yeast, the bread will be denser and flat. However, there are yeast-free flatbread recipes, but they won’t replicate authentic Pita Bread (Middle East) exactly.
How long does pita bread stay fresh?
When stored properly at room temperature, pita bread remains fresh for about 2 days. Beyond that, it may begin to dry out or become chewy, so freezing is recommended if you want to keep it longer.
Is pita bread gluten-free?
Traditional Pita Bread (Middle East) is made from wheat flour and contains gluten. For gluten-free options, you would need alternative recipes using specific gluten-free flour blends designed for bread-making.
Final Thoughts
Making your own Pita Bread (Middle East) at home is a joyous kitchen adventure that rewards you with soft, warm pockets bursting with heritage and flavor. It’s incredibly satisfying to see those perfect puffs emerge from your oven, and even better to share them with family and friends. Give this recipe a try, and soon you’ll understand why pita holds a special place in hearts and kitchens across the Middle East.