No-Bake Oreo Balls Recipe
If you’re craving a treat that’s both irresistibly chocolatey and incredibly easy to make, then these No-Bake Oreo Balls will quickly become your new favorite dessert. Combining the classic crunch of Oreo cookies with the smooth, luscious cream cheese center, these bite-sized truffles are then dipped in rich chocolate to create a perfectly decadent finish. They come together without turning on the oven, meaning you can whip them up anytime you want a sweet snack that feels special but doesn’t demand a lot of fuss or time.
Ingredients You’ll Need
These ingredients are delightfully simple but each plays a crucial role in creating the magic of No-Bake Oreo Balls. The crushed Oreos provide that signature cookie flavor and texture, the cream cheese adds softness and richness for the perfect creamy bite, and the melted chocolate brings everything together with a glossy, decadent coating.
- 2 cups crushed Oreo cookies: Crushed finely for just the right texture to bind everything together without being too chunky.
- 1/2 cup cream cheese: Adds creaminess and helps the mixture hold shape while balancing the cookie’s sweetness.
- 1 cup melted chocolate: For coating, use good-quality chocolate to get a smooth, shiny finish that hardens beautifully.
How to Make No-Bake Oreo Balls
Step 1: Mix Oreo Cookies and Cream Cheese
Begin by putting those crushed Oreo cookies into a bowl, then add the cream cheese. Use a spoon or your hands to mix everything until it forms a smooth, uniform dough. It might look a little crumbly at first, but keep mixing until it holds together well. This step is key because the cream cheese binds the cookies while giving your truffles that creamy center everyone loves.
Step 2: Shape into Small Balls
Once your mixture is ready, it’s time to get hands-on. Scoop out small portions—about one inch in diameter—and roll them between your palms until smooth. The size is essential here: making them bite-sized makes them perfect for sharing and eating without any mess.
Step 3: Dip in Melted Chocolate
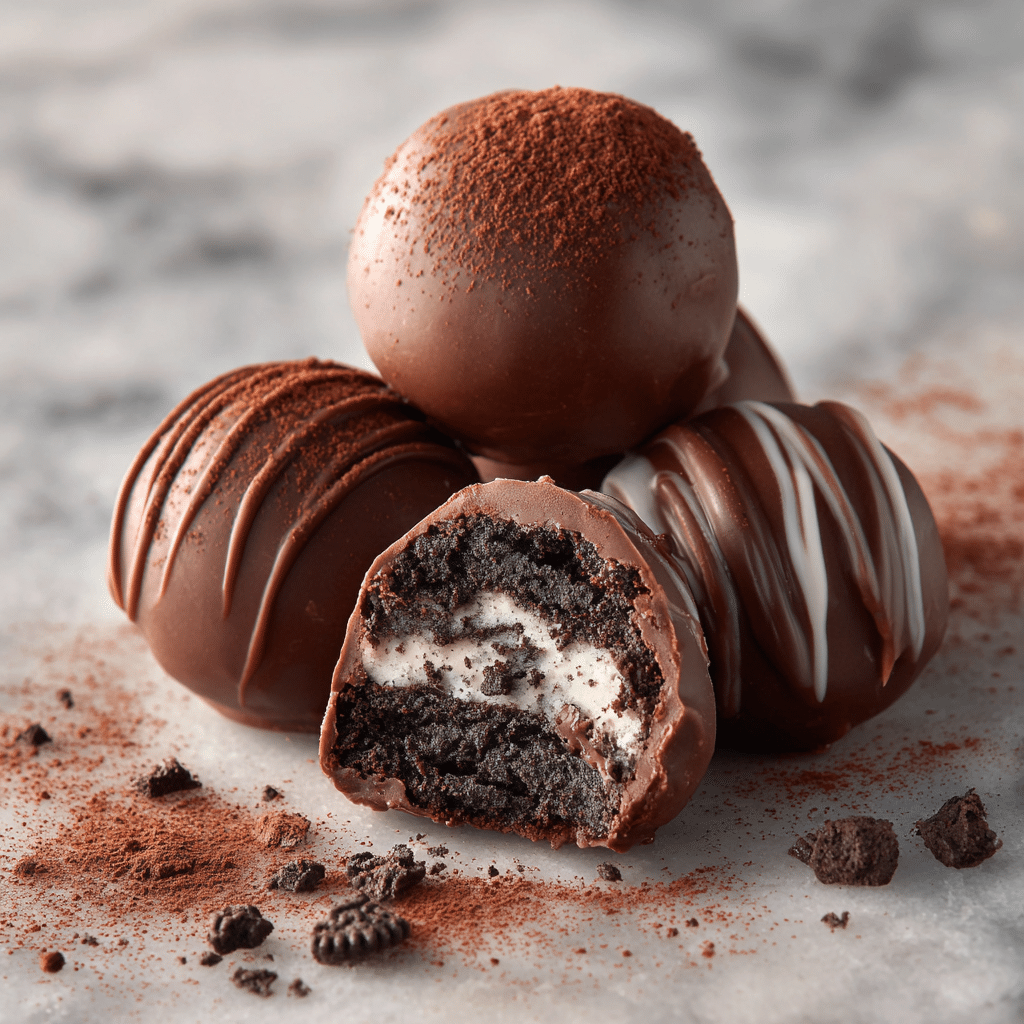
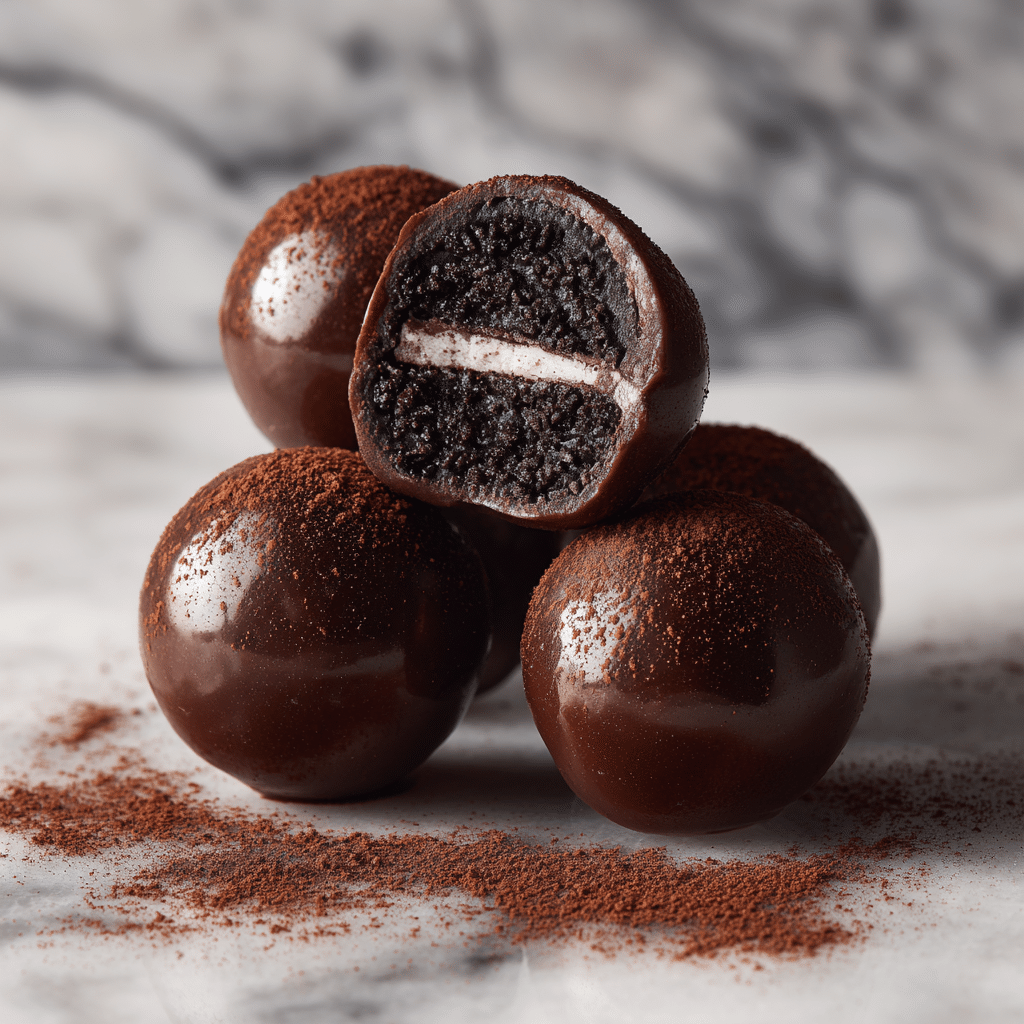
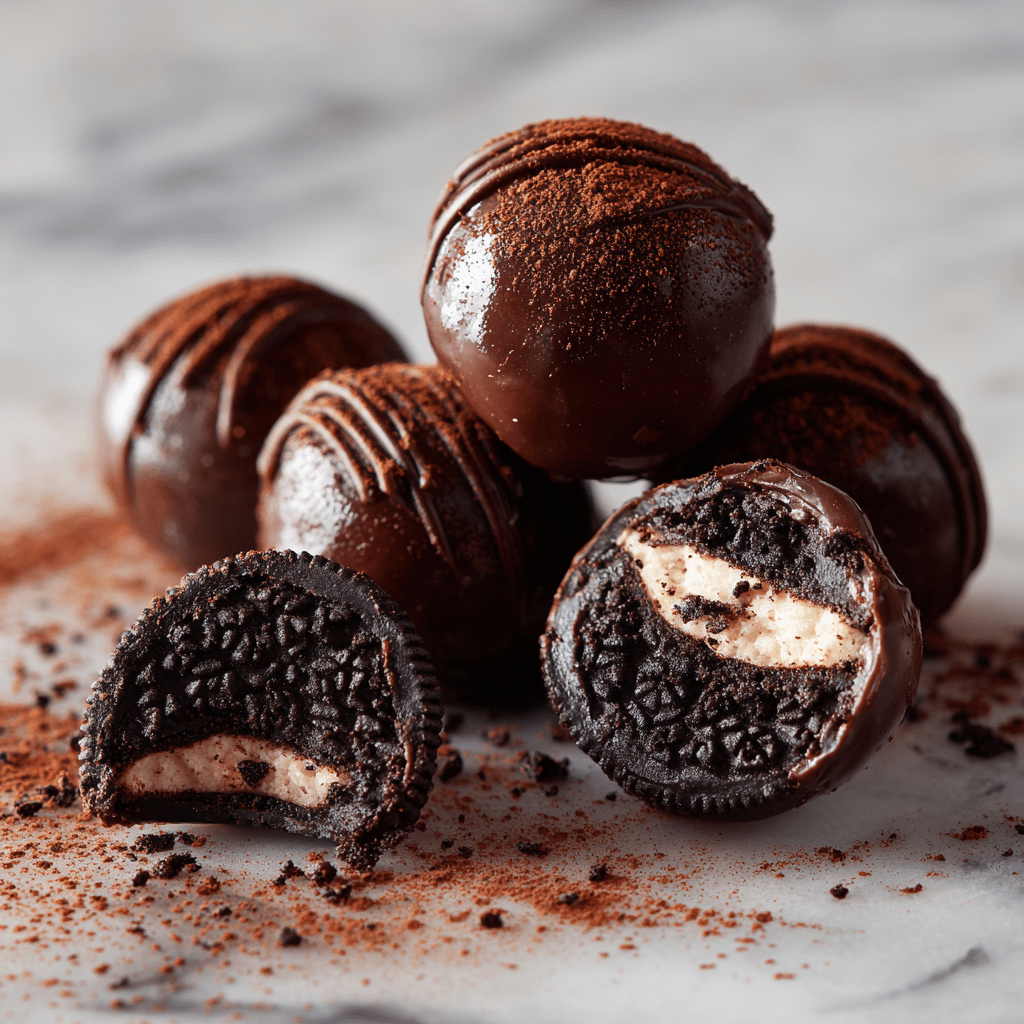
Now comes the fun, indulgent part. Dip each Oreo ball into the melted chocolate, ensuring every bite is coated in that luxurious chocolate shell. Using a fork helps with excess chocolate to drip off for a nice thin coat. Place the dipped balls on parchment paper or a cooling rack to set.
Step 4: Chill Until Set
Pop your chocolate-covered Oreo balls into the refrigerator for at least 30 minutes to allow the chocolate to harden and everything to firm up. This chilling time is crucial to get the right texture and make them easy to handle.
How to Serve No-Bake Oreo Balls
Garnishes
Sprinkle some crushed Oreo crumbs or a drizzle of white chocolate over the top for an extra touch of elegance. You can also dust them lightly with cocoa powder or add a pinch of sea salt to heighten the chocolate flavor and create a stunning contrast.
Side Dishes
Serve your No-Bake Oreo Balls alongside a fresh cup of coffee, hot chocolate, or a scoop of vanilla ice cream. The creamy flavor profiles complement each other so well, making for an indulgent dessert spread that will impress guests or satisfy your own sweet tooth.
Creative Ways to Present
Try arranging your Oreo balls on a tiered dessert stand or in mini cupcake liners for a festive party presentation. You can also skewer them on sticks and dip in sprinkles before the chocolate sets, transforming them into Oreo cake pops. Presentation makes these treats look as delightful as they taste.
Make Ahead and Storage
Storing Leftovers
Keep any leftover No-Bake Oreo Balls in an airtight container in the refrigerator. They stay fresh for up to one week, making them a great option to prepare ahead of time for gatherings or just sweet cravings throughout the week.
Freezing
No-Bake Oreo Balls freeze beautifully. Lay them out on a tray first to freeze individually, then transfer to a freezer-safe bag or container. They can be stored for up to 3 months and thawed in the refrigerator before serving without losing their delightful texture.
Reheating
Since these are best enjoyed chilled, reheating isn’t necessary. If your chocolate coating softens too much at room temperature, just pop them back in the fridge for a few minutes to firm up again. They’re meant to be eaten cold or at room temperature for the perfect bite.
FAQs
Can I use a different cookie instead of Oreos?
Absolutely! While Oreos are classic, you can experiment with other sandwich cookies or even crushed chocolate chip cookies for a unique twist on the No-Bake Oreo Balls. Just make sure the cookie crumbs are finely crushed for the right texture.
What kind of cream cheese should I use?
Regular, full-fat cream cheese works best for richness and binding power. Low-fat or whipped cream cheese might alter the texture and flavor, making the balls less creamy and more crumbly.
Can I add flavorings to the mixture?
Definitely! A splash of vanilla extract or a spoonful of peanut butter can add a fun layer of flavor. Just mix it in with the cream cheese and Oreo crumbs before shaping your balls.
Is it necessary to chill the balls before dipping in chocolate?
Chilling first is optional but can make dipping easier and faster to set. If the mixture feels too soft, refrigerating for 15–20 minutes before dipping helps maintain shape and ensures a smooth chocolate coating.
How do I prevent the chocolate from cracking after it sets?
Use good-quality chocolate and melt it slowly to avoid overheating. Let the chocolate set at room temperature or in the fridge without moving the balls too much. Also, avoid drastic temperature changes when serving or storing to keep the coating smooth.
Final Thoughts
There is something so satisfying about pulling together a batch of No-Bake Oreo Balls that not only look gorgeous but taste like a decadent treat. They are quick to make, impossible to resist, and perfect for any occasion—whether you’re hosting a party or just enjoying a sweet moment with yourself. I hope you give this recipe a try and find as much joy in making and eating these little delights as I do!