Chocolate Covered Frozen Yogurt Buttons Recipe
Chocolate Covered Frozen Yogurt Buttons are the perfect little indulgence when you want a refreshing treat that balances creamy tang with rich chocolate. These tiny frozen gems pack a flavorful punch in each bite, combining the cool smoothness of yogurt with a crisp chocolate shell that snaps delightfully. Whether you’re looking for a guilt-free snack or a fun addition to party platters, these bite-sized delights are as charming to look at as they are satisfying to eat.
Ingredients You’ll Need
Getting started with Chocolate Covered Frozen Yogurt Buttons is a breeze because the ingredients are straightforward yet crucial to the charm of this treat. Each one plays a vital role in creating the perfect texture, flavor, and visual appeal.
- Plain or flavored yogurt: The creamy base that freezes into smooth, tangy buttons; Greek yogurt works fabulously for thickness.
- High-quality chocolate chips or bars: Choose dark, milk, or white chocolate based on your preference for the perfect coating.
- Optional toppings: Sprinkles, crushed nuts, or shredded coconut add an extra touch of color and crunch.
- Silicone mat or parchment paper: Essential for easy removal of the frozen buttons after dipping.
How to Make Chocolate Covered Frozen Yogurt Buttons
Step 1: Prepare the Yogurt Buttons
Begin by spooning small drops of yogurt onto a silicone mat or parchment-lined tray. Make sure to space the drops slightly apart, aiming for uniform sizes so the freezing and chocolate coating cook evenly. Pop the tray into the freezer and let the yogurt drop sets freeze solid, typically for 2 to 3 hours or overnight if you want to prepare ahead.
Step 2: Melt the Chocolate
While the yogurt buttons are freezing, gently melt your chocolate in a heatproof bowl over simmering water or in short bursts in the microwave, stirring frequently. Patience here is key for smooth, glossy chocolate — any overheating can cause it to seize, so keep the heat low and steady.
Step 3: Dip the Frozen Yogurt Buttons
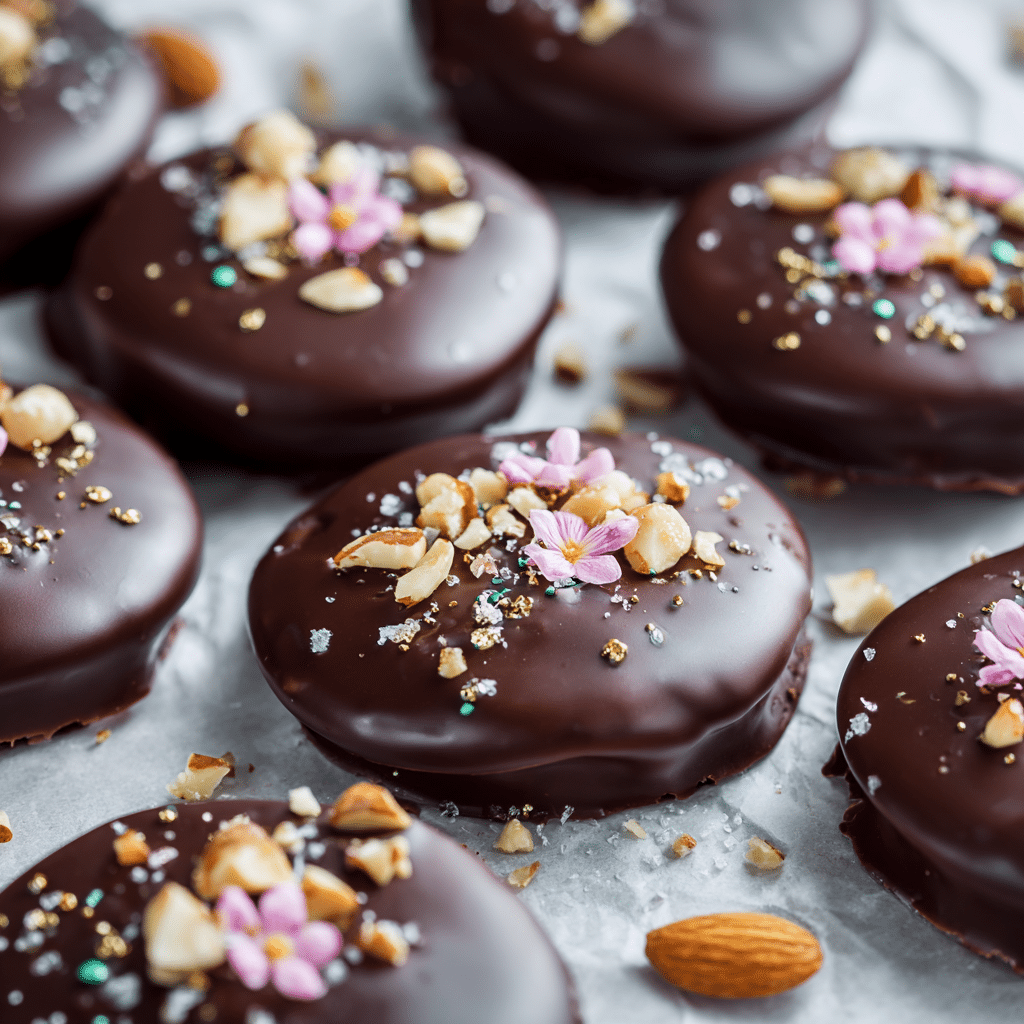
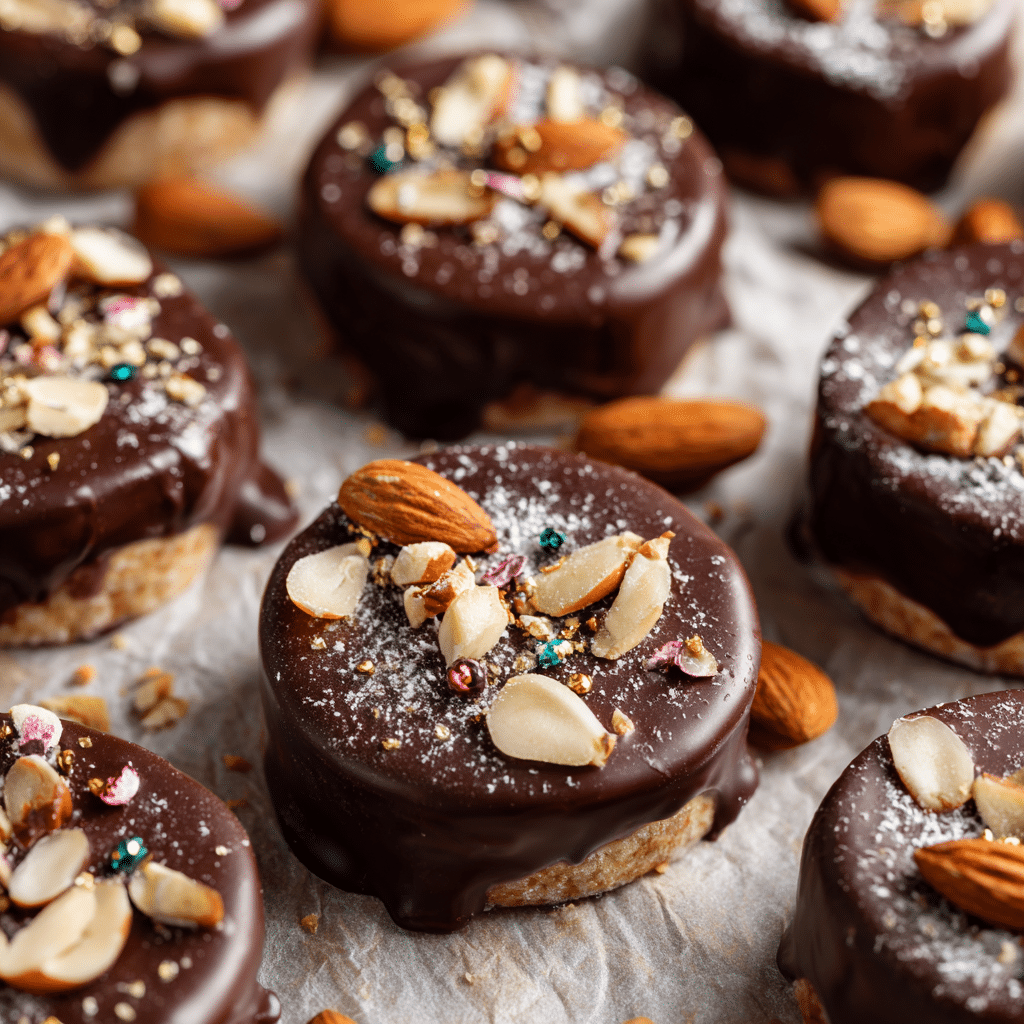
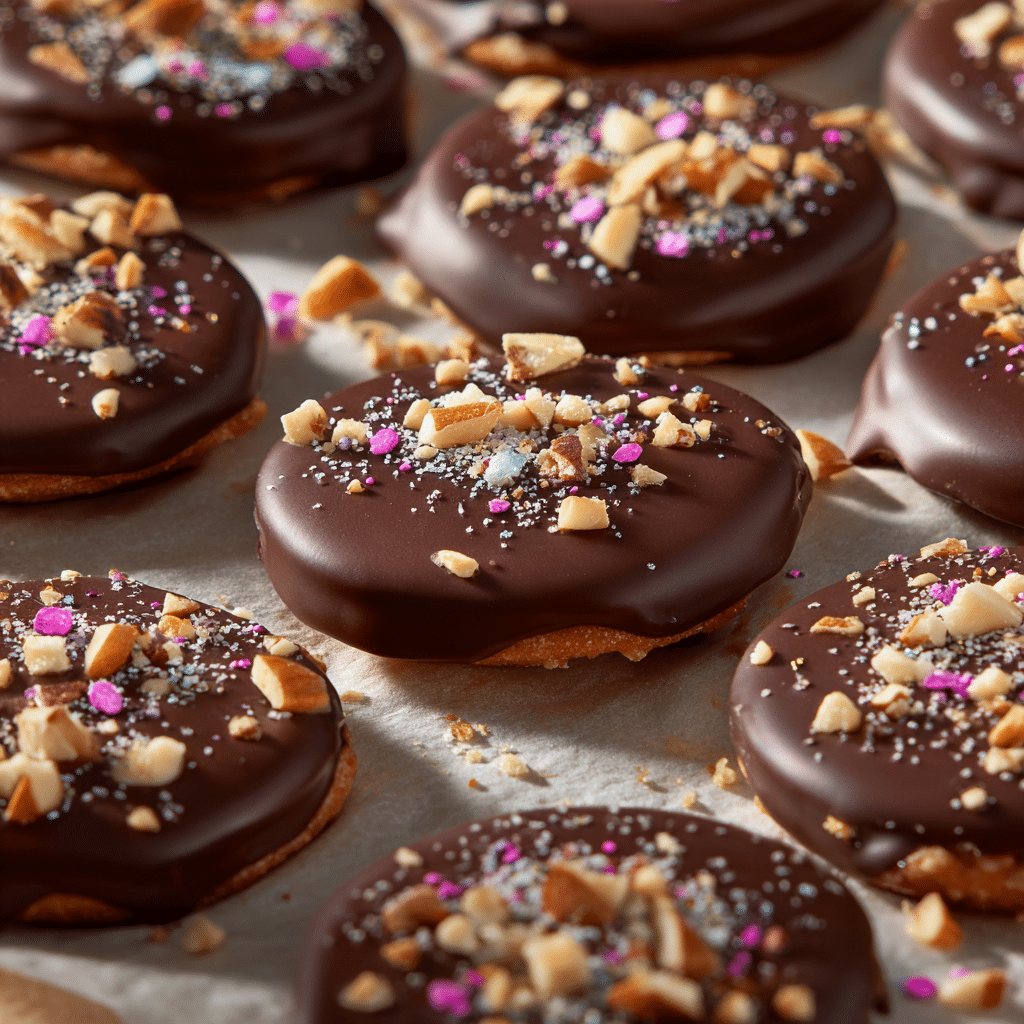
Once the yogurt drops are fully frozen, quickly dip each button into the warm melted chocolate. The frozen yogurt helps the chocolate set rapidly, forming a nice, thin shell that snaps when bitten. Place the coated buttons back onto the tray to firm up, and if you’re using toppings, sprinkle them on immediately after dipping.
Step 4: Freeze Until Firm
Return the chocolate-covered buttons to the freezer for at least 30 minutes, allowing the chocolate shells to set completely. This final step ensures they’re perfectly solid and ready to enjoy anytime you need a quick treat.
How to Serve Chocolate Covered Frozen Yogurt Buttons
Garnishes
Elevate your Chocolate Covered Frozen Yogurt Buttons with a dusting of edible glitter or a sprinkle of crushed freeze-dried fruit for a burst of color and extra flavor layers. Fresh mint leaves also pair beautifully for a refreshing lift when presenting these treats.
Side Dishes
Serve these buttons alongside a fresh fruit platter or a bowl of mixed nuts to keep the snack well-rounded and visually inviting. They also make a delightful contrast when plated with warm desserts like brownies or molten cakes for an indulgent dessert spread.
Creative Ways to Present
Arrange the buttons in small paper cupcake liners or on decorative serving trays for parties or casual get-togethers. You can even skewer several buttons with toothpicks to create fun “frozen yogurt lollipops” that kids and adults alike will adore.
Make Ahead and Storage
Storing Leftovers
Keep any leftover Chocolate Covered Frozen Yogurt Buttons in an airtight container in the freezer. They maintain their texture and flavor best when stored cold, so avoid leaving them out at room temperature for long.
Freezing
Because they’re already frozen, Chocolate Covered Frozen Yogurt Buttons freeze exceptionally well. Just ensure they’re stored in a single layer or separated by parchment paper to prevent sticking together.
Reheating
These buttons are best enjoyed frozen and shouldn’t be reheated, as warming will soften the yogurt and melt the chocolate, losing their signature snap and creaminess. If you prefer them slightly softer, let them sit for a few minutes at room temperature before indulging.
FAQs
Can I use flavored yogurt for the buttons?
Absolutely! Flavored yogurts add a fun twist to the taste, making each button a little burst of unique flavor. Just be mindful of the yogurt’s sugar content, as it can affect the freezing process slightly.
What type of chocolate is best for dipping?
High-quality chocolate chips or bars that melt smoothly work best. Dark chocolate offers a rich, slightly bitter complement to yogurt, while milk or white chocolate creates a sweeter, creamier shell.
How long do Chocolate Covered Frozen Yogurt Buttons last?
Stored properly in the freezer, they usually stay fresh and tasty for up to two weeks, making them a convenient make-ahead snack.
Can I use a different yogurt consistency?
Yes, though Greek yogurt or thicker yogurts freeze into firmer buttons more easily. If using thinner yogurts, consider straining them to remove excess liquid.
Are there vegan options for this recipe?
Definitely! Use plant-based yogurts and dairy-free chocolate to create vegan-friendly Chocolate Covered Frozen Yogurt Buttons that everyone can enjoy.
Final Thoughts
Making Chocolate Covered Frozen Yogurt Buttons is such a joyful experience, from watching the little yogurts freeze into perfect rounds to dipping them into luscious chocolate. They are a wonderful way to treat yourself or surprise friends with a healthy yet indulgent snack. Next time you crave something sweet but refreshing, give these buttons a try—you’ll find yourself reaching for them again and again!