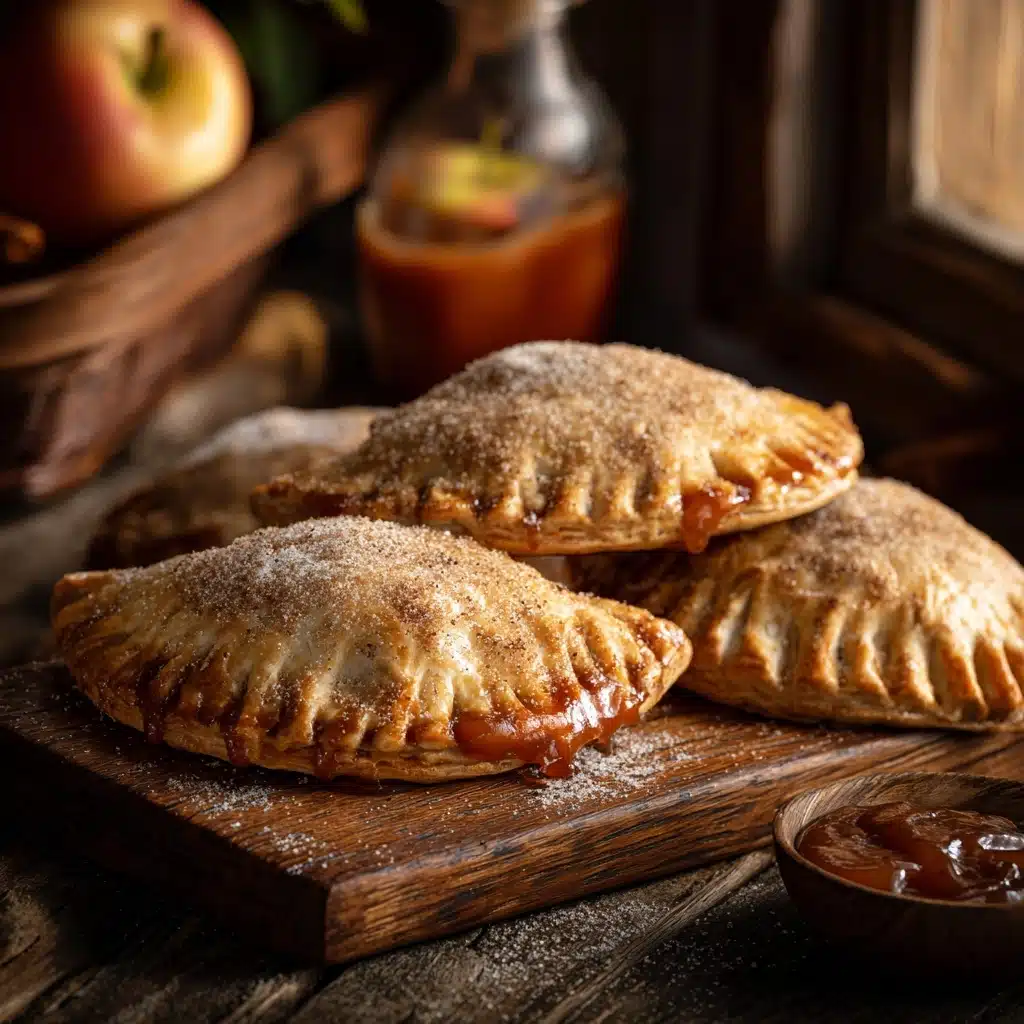
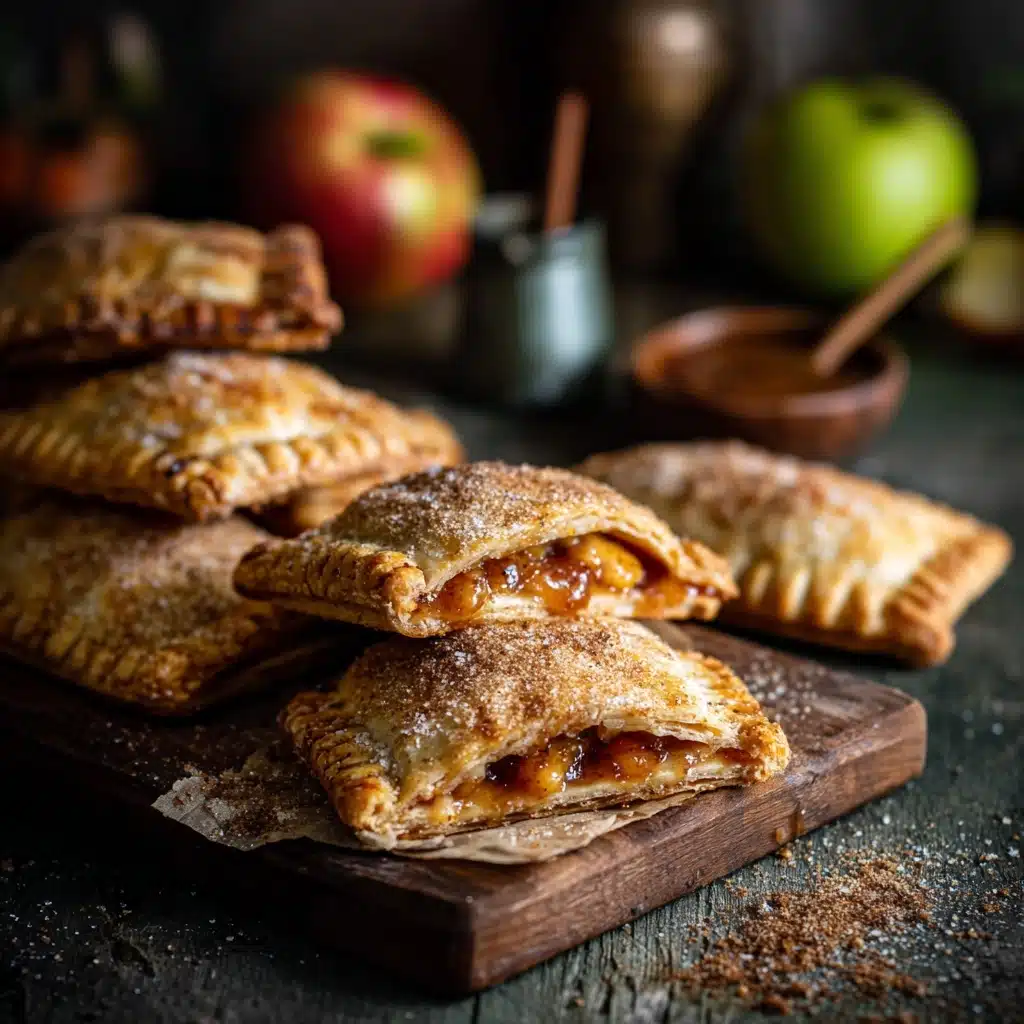
Apple Butter Hand Pies Recipe
If you’re looking for a delightful treat that captures cozy autumn vibes in every bite, these Apple Butter Hand Pies are absolutely the answer. Imagine flaky, buttery crusts wrapped around a sweet, warmly spiced apple butter filling—portable, perfectly portioned pockets of fall magic that make snack time or dessert feel extra special. Whether you’re craving something to enjoy with your afternoon tea or a charming dessert to impress guests, these hand pies bring that nostalgic, homemade goodness everyone loves.
Ingredients You’ll Need
Creating these charming Apple Butter Hand Pies doesn’t require an endless list of ingredients. Each component plays a vital role, ensuring your pies come out flaky, flavorful, and perfectly spiced.
- 2 Pie crusts: These serve as the flaky, tender shells that wrap up the luscious filling—store-bought or homemade both work beautifully.
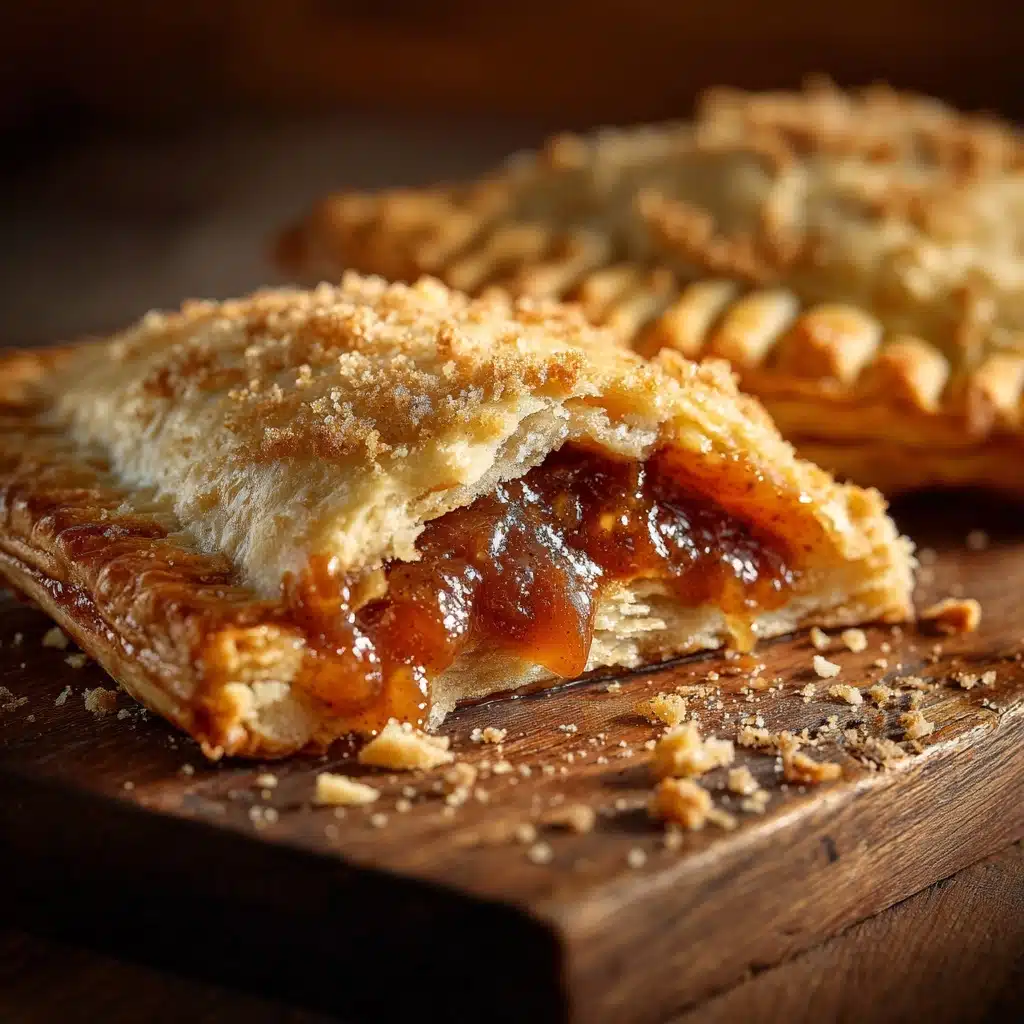
- ½ cup Apple butter: The heart of the pies, this smooth, spiced apple spread brings sweetness and warmth, creating that iconic fall flavor.
- 1 Egg (for egg wash): Brushed on the crust to give the pies a gorgeous golden shine and help the sugar stick.
- 2 Tbsp Sugar + ½ tsp Cinnamon (for topping): This cinnamon sugar combo adds a sweet, crunchy finish and a fragrant hint that teases your senses before the first bite.
How to Make Apple Butter Hand Pies
Step 1: Preheat and Prepare
Start by preheating your oven to 375°F (190°C). This ensures it’s hot and ready to bake your pies to golden perfection. While it’s heating up, unwrap your pie crusts and set them on a clean surface to become pliable enough for cutting.
Step 2: Cut Dough and Add Filling
Using a round cutter or the rim of a glass, cut out circles from the pie crusts. Each circle is going to become one of your hand pies. Spoon about a tablespoon of apple butter right in the center of each circle—don’t overfill, or the pies might burst while baking!
Step 3: Seal the Pies
Fold each circle over to create a half-moon shape. Press the edges together, then crimp them with a fork or your fingers to seal the filling inside snugly. This step ensures none of that luscious apple butter will escape during baking.
Step 4: Egg Wash and Sprinkle Sugar
In a small bowl, beat your egg and brush it over the tops of each pie. This little trick gives the crust a beautiful golden color and helps the cinnamon sugar topping stick perfectly.
Step 5: Bake to Golden Perfection
Place the pies on a parchment-lined baking sheet, sprinkle generously with the cinnamon sugar mixture, and bake for 20 to 25 minutes. You’ll know they’re ready when the crust turns a stunning golden brown and you can smell that sweet apple aroma wafting through your kitchen.
How to Serve Apple Butter Hand Pies
Garnishes
Serve your Apple Butter Hand Pies warm with a light dusting of powdered sugar or a drizzle of caramel sauce to elevate the sweetness and give them a little extra wow factor. Fresh whipped cream or a scoop of vanilla ice cream is a classic companion that simply cannot be beat.
Side Dishes
These hand pies pair wonderfully with a hot cup of tea, a spiced latte, or even a chilled glass of apple cider for a perfect balance. For brunch, serve alongside crispy bacon or savory eggs to mix sweet and savory flavors.
Creative Ways to Present
Try presenting the hand pies on a rustic wooden board with fresh autumn leaves and cinnamon sticks for a charming fall-themed display. For parties, arrange them in a basket lined with a cozy cloth napkin—they make beautiful edible gifts, too!
Make Ahead and Storage
Storing Leftovers
If you have any Apple Butter Hand Pies leftover, store them in an airtight container at room temperature for up to two days. This keeps the crust flaky and the filling delicious without drying out.
Freezing
These hand pies freeze wonderfully! Place unbaked pies on a baking sheet and freeze until firm, then transfer to a freezer-safe bag. Bake them straight from frozen, adding a few extra minutes to the baking time for a fresh-from-the-oven experience any day.
Reheating
To bring your Apple Butter Hand Pies back to life, warm them in a 350°F oven for 5 to 10 minutes. This revives the crispiness of the crust while melting the filling to the perfect gooeyness.
FAQs
Can I make these hand pies gluten-free?
Absolutely! Substitute the regular pie crust with a gluten-free variety, and you’ll have delicious gluten-free Apple Butter Hand Pies without sacrificing texture or flavor.
Is it better to use homemade or store-bought apple butter?
Both work wonderfully, but homemade apple butter lets you customize the spices and sweetness. Store-bought apple butter is a fantastic shortcut if you’re short on time or just want convenience.
Can I add extra ingredients to the filling?
Yes! Chopped nuts like pecans or walnuts add great texture, and a handful of raisins or dried cranberries lends a nice burst of tanginess to complement the apple butter.
What size should I cut the dough circles?
Circles around 4 to 5 inches in diameter work perfectly, creating hand pies that are easy to hold and big enough to enjoy the filling without being overwhelming.
How do I prevent the filling from leaking?
Make sure to seal the edges firmly by crimping with a fork and avoid overfilling. Brushing water or egg wash on the edges before folding can help create a tighter seal.
Final Thoughts
I honestly can’t recommend making Apple Butter Hand Pies enough—they’re such a cozy, lovable dessert that feels like a warm hug in pastry form. With their simple ingredients and straightforward steps, these hand pies are as approachable as they are delicious. So go ahead, make a batch and watch them disappear in no time—the magic of spiced apple butter wrapped in flaky crust is that irresistible!