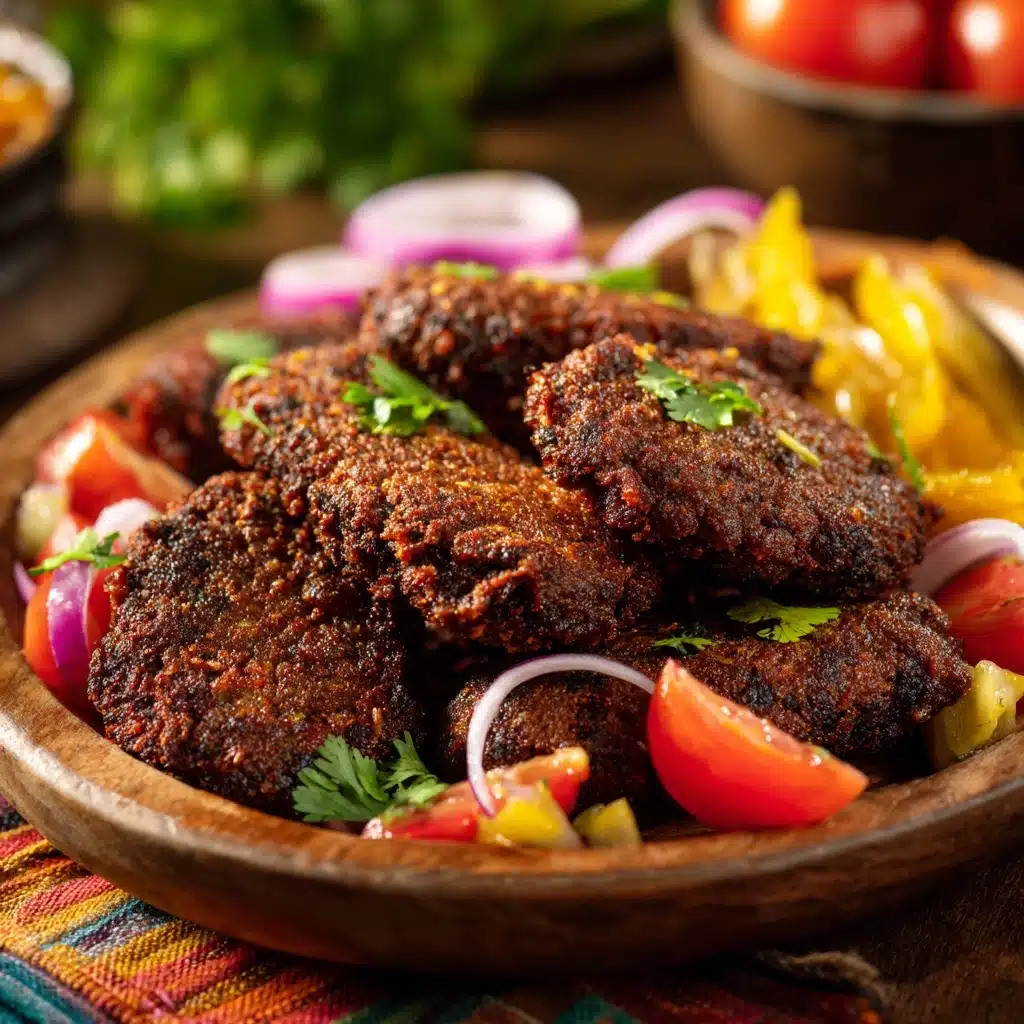
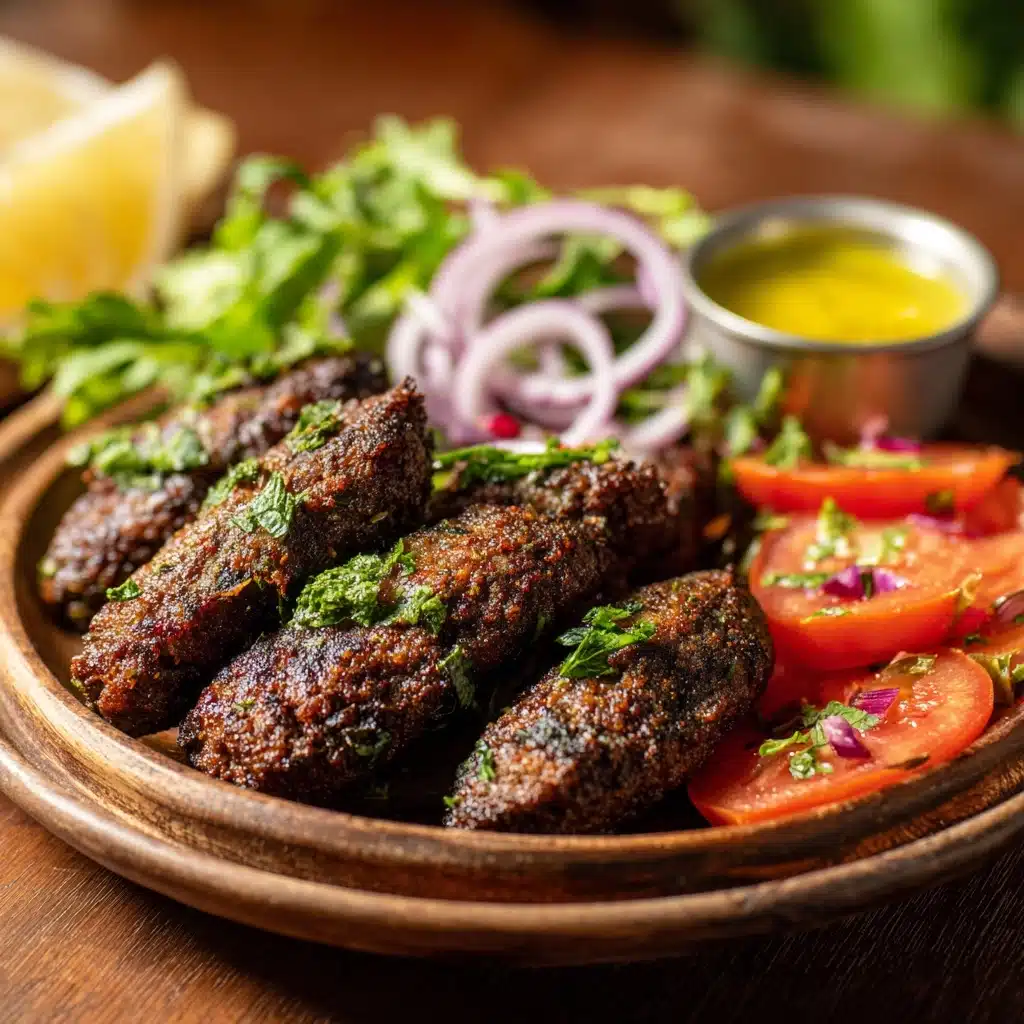
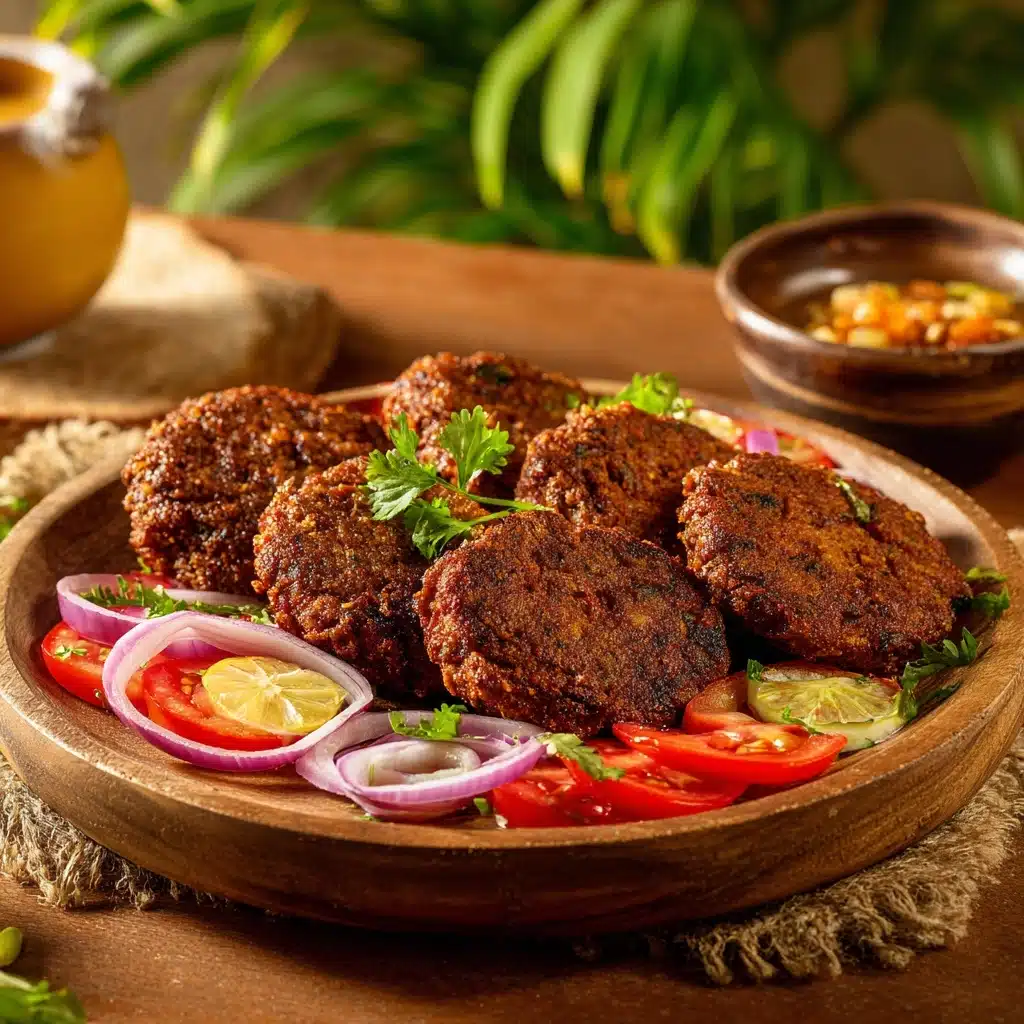
Chapli Kebab with Tomato Salad Recipe
If you’re craving something truly special that combines bold flavors with a fresh, zesty kick, then this Chapli Kebab with Tomato Salad recipe is exactly what you need. These chapli kebabs are packed with aromatic spices and tender meat that melt in your mouth, giving you a mouthwatering experience reminiscent of the vibrant streets of Bangladesh. Paired with a simple tomato salad bursting with freshness and a hint of tang, this dish strikes an irresistible balance between rich and light that will have you coming back for seconds, no question about it.
Ingredients You’ll Need
Gathering the right ingredients for this Chapli Kebab with Tomato Salad is surprisingly straightforward. Each element plays a vital role: the spices infuse the meat with warmth, the herbs bring brightness, and the fresh tomato salad rounds it all out with refreshing contrast.
- 1 lb ground beef or lamb: The hearty base, choose fresh meat for the best texture and flavor.
- 1 medium onion, finely chopped: Adds subtle sweetness and helps bind the kebabs.
- 2-3 green chilies, finely chopped: For a gentle touch of heat that wakes up the palate.
- 1 tablespoon fresh ginger, minced: Brings a zingy freshness to balance the richness.
- 1 tablespoon fresh garlic, minced: Enhances the depth of flavor with aromatic warmth.
- 1/4 cup fresh coriander, chopped: Offers herbal brightness that lifts the dish.
- 1 teaspoon cumin powder: Adds earthiness and complexity to the meat mixture.
- 1 teaspoon coriander powder: Provides a mild citrus undertone to enliven the kebabs.
- 1/2 teaspoon garam masala: A blend of spices that gives warmth and richness.
- 1/2 teaspoon red chili powder: Gives a bit more punch and color to the kebabs.
- Salt to taste: Essential for bringing all the flavors together.
- 1 large egg: Acts as a binder to keep everything together during cooking.
- Oil for frying: Use any neutral oil suitable for frying to get that perfect crispy crust.
- 1 cup cherry tomatoes, halved: Sweet and juicy, the star of the salad side.
- 1 tablespoon lemon juice: Adds a bright, tangy punch to the tomato salad.
- Salt and pepper to taste: To season the tomato salad just right.
How to Make Chapli Kebab with Tomato Salad
Step 1: Prepare the Meat Mixture
Start by combining the ground beef or lamb with the finely chopped onion, green chilies, ginger, garlic, and fresh coriander in a large bowl. Sprinkle in the cumin powder, coriander powder, garam masala, red chili powder, and salt. Break in the egg to help everything bind beautifully. Use your hands to mix thoroughly, ensuring all those fantastic spices are evenly incorporated throughout the meat. This is where the magic begins—the blend of textures and aromas will make you eager to get cooking.
Step 2: Shape the Kebabs
Once your mixture feels well combined, divide it into equal portions and gently form each into a flat, round patty about half an inch thick. Flattening them slightly helps achieve that signature crispy and golden exterior while keeping the inside tender and juicy. You’ll notice how the mixture holds together nicely thanks to the egg and onion – no crumbling here!
Step 3: Fry the Kebabs
Heat enough oil in a frying pan over medium heat—enough to shallow fry the kebabs to golden perfection. Carefully place the patties in the hot oil, making sure not to overcrowd the pan. Fry each side for about 4-5 minutes, or until a rich brown crust forms and the insides are cooked through. The sizzling sound and deep aroma at this point are almost irresistible, and trust me, it’s worth every second of the wait.
Step 4: Prepare the Tomato Salad
While your kebabs are frying, quickly toss the halved cherry tomatoes with lemon juice, salt, and freshly ground black pepper in a bowl. This refreshing salad provides a juicy, tangy counterpoint to the spiced meat, bringing balance and brightness to your meal. Let it rest for a few minutes to marry the flavors before serving alongside your sizzling kebabs.
How to Serve Chapli Kebab with Tomato Salad
Garnishes
Presentation is key when you want to impress! Sprinkle some freshly chopped coriander or mint leaves on top of your Chapli Kebab with Tomato Salad for a burst of color and herbaceous aroma. A wedge of lemon on the side invites everyone to squeeze a little extra brightness over their kebabs. These simple touches elevate the dish beautifully and please both the eyes and the palate.
Side Dishes
While this Chapli Kebab with Tomato Salad stands proudly on its own, pairing it with fragrant basmati rice or warm naan bread makes the experience even more indulgent. You might also consider adding a dollop of cooling yogurt or raita to mellow the spices and add a creamy contrast, making every bite perfectly balanced.
Creative Ways to Present
If you’re hosting a dinner party or craving a fun twist, serve the kebabs on mini skewers or sandwich them into pita pockets with the tomato salad and some crisp lettuce. You can also create a vibrant platter with assorted grilled veggies and your salad for a colorful, shareable feast. The possibilities are endless and each variation keeps this classic recipe fresh and exciting.
Make Ahead and Storage
Storing Leftovers
Leftover chapli kebabs and tomato salad can be stored in airtight containers in the refrigerator for up to 2 days. Keep the salad separate from the kebabs to prevent sogginess. This way, you can easily enjoy a delicious homemade meal even on your busiest days without any compromise on flavor.
Freezing
These kebabs freeze wonderfully! Place the uncooked kebabs on a baking sheet lined with parchment paper and freeze until firm. Then transfer to a freezer-safe bag or container and freeze for up to 1 month. When you’re ready, cook them straight from the freezer, just add a few extra minutes to the cooking time. The tomato salad is best fresh but can be remade quickly with fresh ingredients as needed.
Reheating
To reheat your chapli kebabs, gently warm them in a skillet over medium heat to retain their crisp outside texture. Avoid microwaving if possible as this can make them soggy. The tomato salad tastes best fresh, so consider making a quick batch if you want that vibrant, juicy freshness with your leftovers.
FAQs
What type of meat is best for Chapli Kebab?
Ground beef or lamb are both excellent choices for Chapli Kebabs. Lamb lends a slightly gamier, richer flavor, while beef offers a milder taste. Choose fresh meat with a bit of fat content to keep the kebabs juicy and tender.
Can I make Chapli Kebab without frying?
While frying gives the kebabs their signature crispiness, you can bake them in the oven on a greased sheet at 375°F for about 20 minutes, flipping halfway through. The texture will be different but still delicious and a bit healthier.
How spicy is this Chapli Kebab with Tomato Salad?
The heat level is adjustable by controlling the amount of green chilies and red chili powder. It’s meant to be warmly spiced but not overwhelming, so feel free to tweak to your preferred spice tolerance.
What can I substitute for fresh coriander if I don’t have it?
If fresh coriander (cilantro) isn’t available, fresh parsley is a good substitute for the herbal brightness. It won’t be exactly the same but will still add lovely freshness to the kebabs and salad.
Is the tomato salad essential to this dish?
Absolutely! The tomato salad brings a fresh, juicy brightness that balances the richness and spice of the Chapli Kebab beautifully. It’s a classic pairing that elevates the entire meal experience.
Final Thoughts
I truly encourage you to try making this Chapli Kebab with Tomato Salad because it’s one of those dishes that feels like a warm hug from the inside out. The combination of spiced, juicy kebabs with the vibrant, tangy salad is undeniably satisfying and perfect for sharing with friends or savoring on your own. Once you get the hang of the simple steps, this recipe will become a cherished favorite in your kitchen.