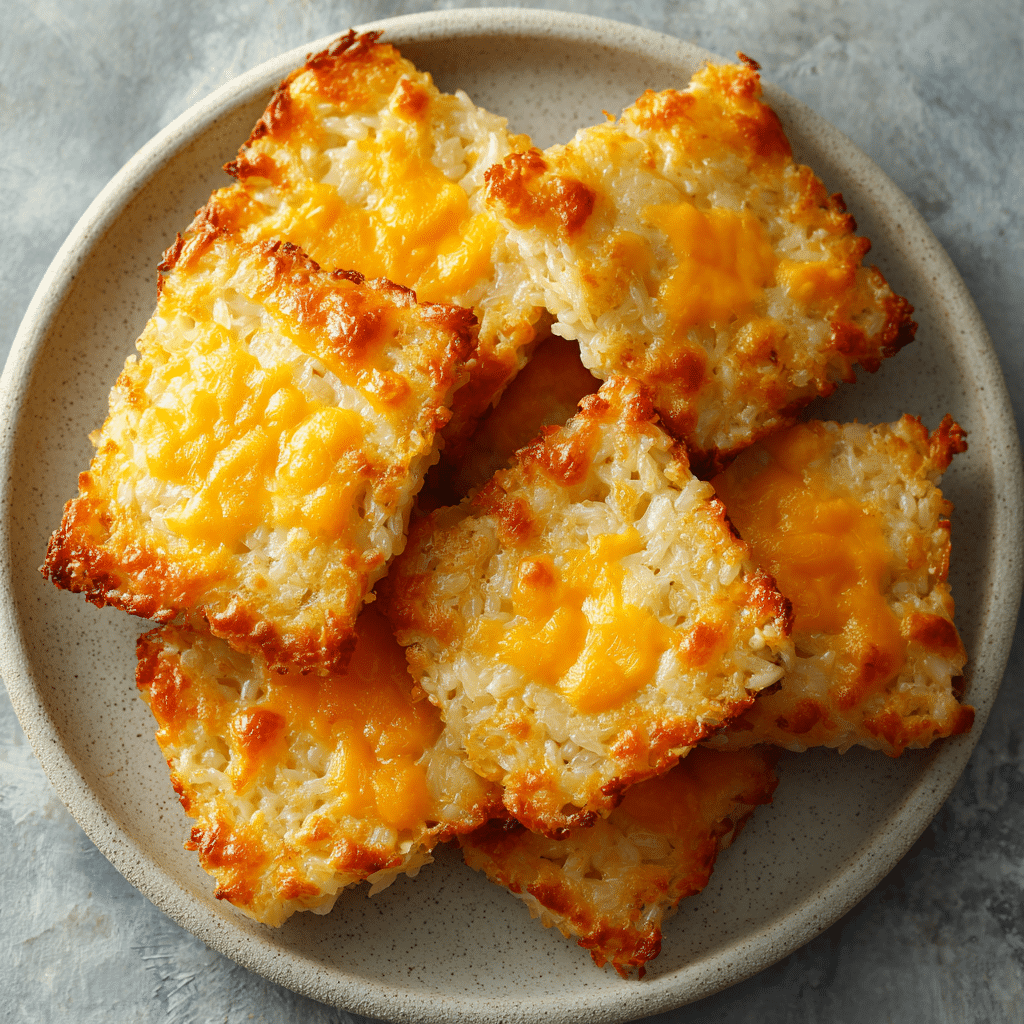
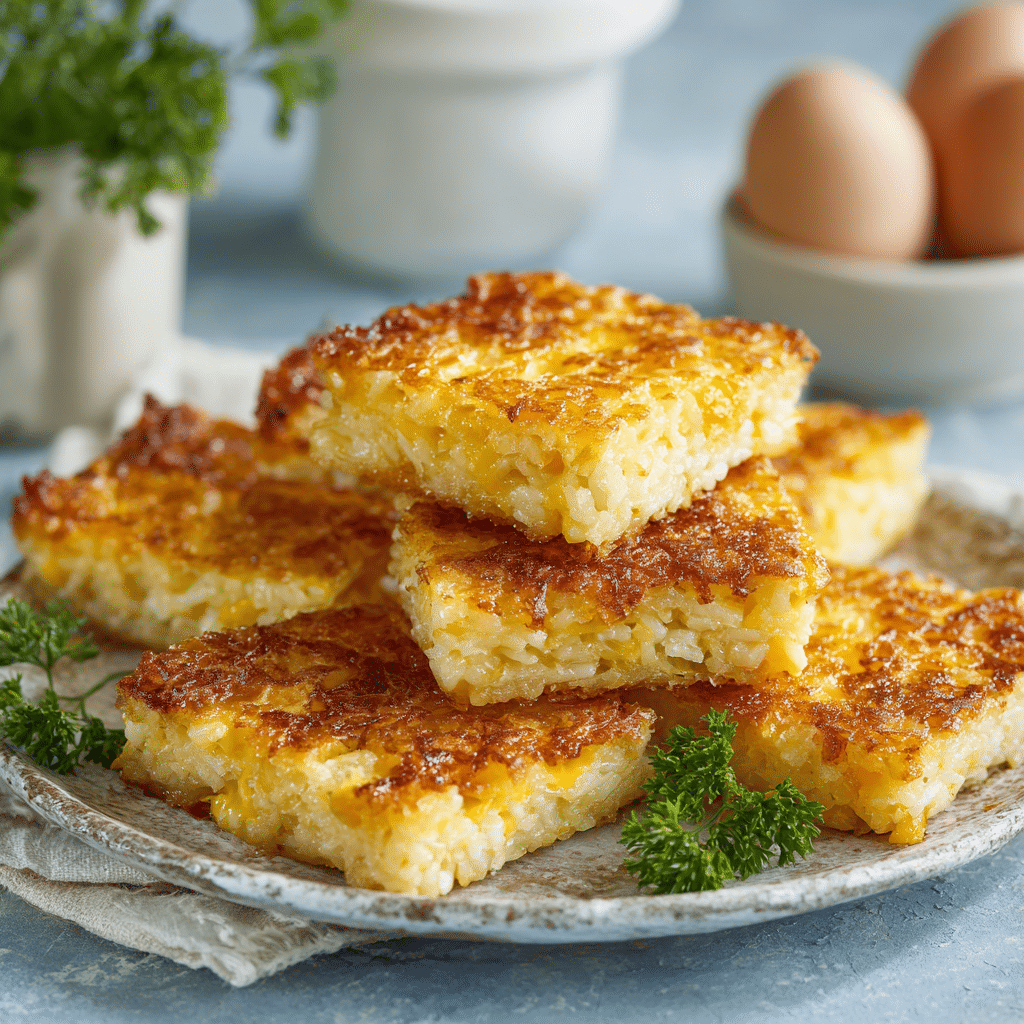
Crispy Rice & Cheese Breakfast Squares Recipe
If you’ve been on the hunt for a breakfast treat that’s both delightfully crispy and irresistibly cheesy, you’re going to love these Crispy Rice & Cheese Breakfast Squares. Imagine golden pan-crisped squares with a melty cheese center and crunchy edges that snap when you bite into them—pure comfort on a plate. Whether you’re looking for a quick morning fix or a special weekend brunch, these squares check all the boxes for being easy to make, deliciously satisfying, and downright addictive.
Ingredients You’ll Need
Creating the perfect Crispy Rice & Cheese Breakfast Squares starts with a handful of simple ingredients, each playing a vital role in the final dish’s texture and flavor. These essentials keep the recipe approachable without compromising on taste or that beautiful golden finish.
- Cooked Rice (1 ½ cups): The star ingredient that forms the crispy base when pan-fried or baked, best if it’s leftover and chilled.
- Egg (1): Acts as the binder that holds everything together, ensuring your squares stay intact while cooking.
- Shredded Cheese (½ cup): Adds gooey, melty indulgence inside each square, making every bite rich and flavorful.
- Salt and Pepper to taste: Simple seasonings that enhance the natural flavors without overpowering the dish.
How to Make Crispy Rice & Cheese Breakfast Squares
Step 1: Mix Ingredients Thoroughly
Start by combining the cooked rice, egg, shredded cheese, and a pinch of salt and pepper in a bowl. Mixing everything evenly is key because it allows the cheese to distribute throughout the squares, and the egg to bind the rice together for that perfect bite.
Step 2: Press the Mixture Into a Flat Layer
Once your ingredients are well combined, press the mixture firmly into a flat, even layer on a lined baking sheet or a non-stick pan. The pressing step is crucial since it helps your rice squares hold their shape and ensures each square gets that coveted crispy edge.
Step 3: Pan-Fry or Bake Until Golden
Now for the fun part—cooking! Whether you choose to pan-fry the rice layer until golden on both sides or bake it in the oven, the goal is to get a crispy, crunchy exterior while keeping the inside soft and cheesy. Keep an eye on the heat so you get beautiful golden browning without burning.
Step 4: Slice and Serve Warm
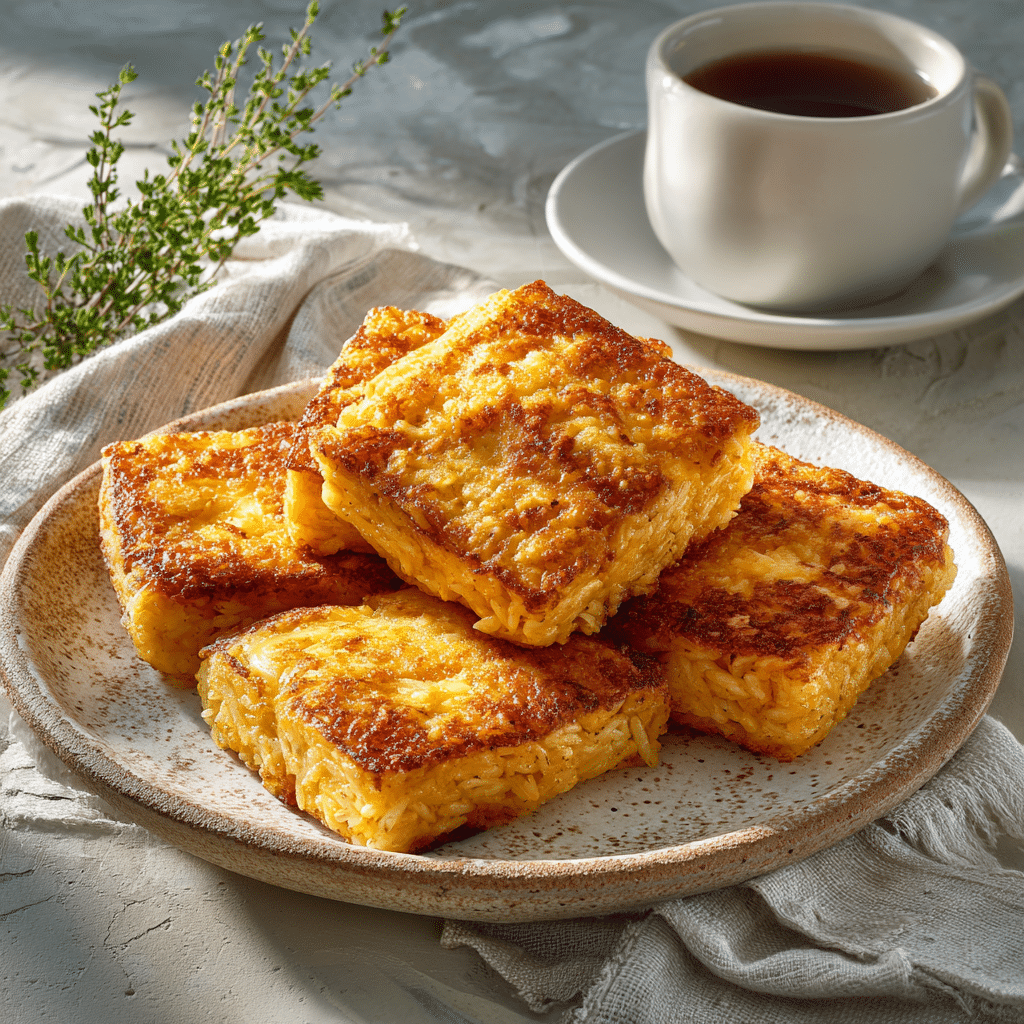
After cooking, let the rice square slab cool slightly, then slice it into neat squares. Serving these breakfast squares warm brings out the best cheesy melt and crisp texture, making every bite a delight.
How to Serve Crispy Rice & Cheese Breakfast Squares
Garnishes
Adding a few vibrant garnishes can take your Crispy Rice & Cheese Breakfast Squares from simple to stunning. Consider fresh chopped chives, a sprinkle of paprika for a smoky touch, or a drizzle of your favorite hot sauce to bring a kick of flavor.
Side Dishes
These squares pair beautifully with a variety of sides. Serve alongside scrambled eggs, crispy bacon, or a fresh fruit salad for a balanced and satisfying breakfast spread. The contrast between crispy squares and juicy fruit is simply unbeatable!
Creative Ways to Present
Try serving these squares stacked like mini breakfast towers layered with avocado slices and tomato for a colorful and inviting presentation. You could even cut them into mini bite-sized pieces and offer them as finger foods for brunch gatherings.
Make Ahead and Storage
Storing Leftovers
If you happen to have leftovers (though they often disappear fast), store the Crispy Rice & Cheese Breakfast Squares in an airtight container in the refrigerator. They’ll stay fresh for up to 3 days, making them perfect for a quick grab-and-go morning snack.
Freezing
To freeze, pop the squares onto a baking sheet lined with parchment paper and freeze until solid. Then transfer them to a freezer-safe bag or container. They can be frozen for up to 2 months and reheated whenever you want a quick crispy, cheesy bite.
Reheating
For best results, reheat leftover or frozen Crispy Rice & Cheese Breakfast Squares in a toaster oven or regular oven to maintain their crispness. Avoid microwaving as it can make them soggy. A quick 5-7 minutes in a 350°F oven will bring back that wonderful crunch.
FAQs
Can I use fresh rice for this recipe?
While fresh rice will work, leftover chilled rice is preferred because it’s drier and helps create that crisp texture. Fresh, hot rice might make the mixture too sticky and wet.
What kind of cheese works best for these breakfast squares?
Shredded cheddar, mozzarella, or a blend work beautifully. Choose a cheese that melts well to get that gooey interior.
Can I add other ingredients like herbs or veggies?
Absolutely! Finely chopped herbs such as parsley or green onions can add freshness, and small diced vegetables like bell peppers or spinach can boost flavor and nutrition.
Is it possible to bake these instead of frying?
Yes, baking is a great alternative if you want a hands-off cooking method. Just bake the pressed mixture at 400°F for 15-20 minutes, flipping halfway through, until golden and crispy.
How do I prevent the squares from falling apart?
Make sure to mix the egg thoroughly with the rice and press the mixture firmly before cooking. Cooking over moderate heat helps the squares hold their shape and develop that crispy crust.
Final Thoughts
Crispy Rice & Cheese Breakfast Squares are a true morning game-changer—simple to make, wonderfully crispy, and packed with flavor. Once you make these, they’re sure to become a beloved staple in your breakfast rotation. Go ahead, try them out and savor every golden, cheesy bite!