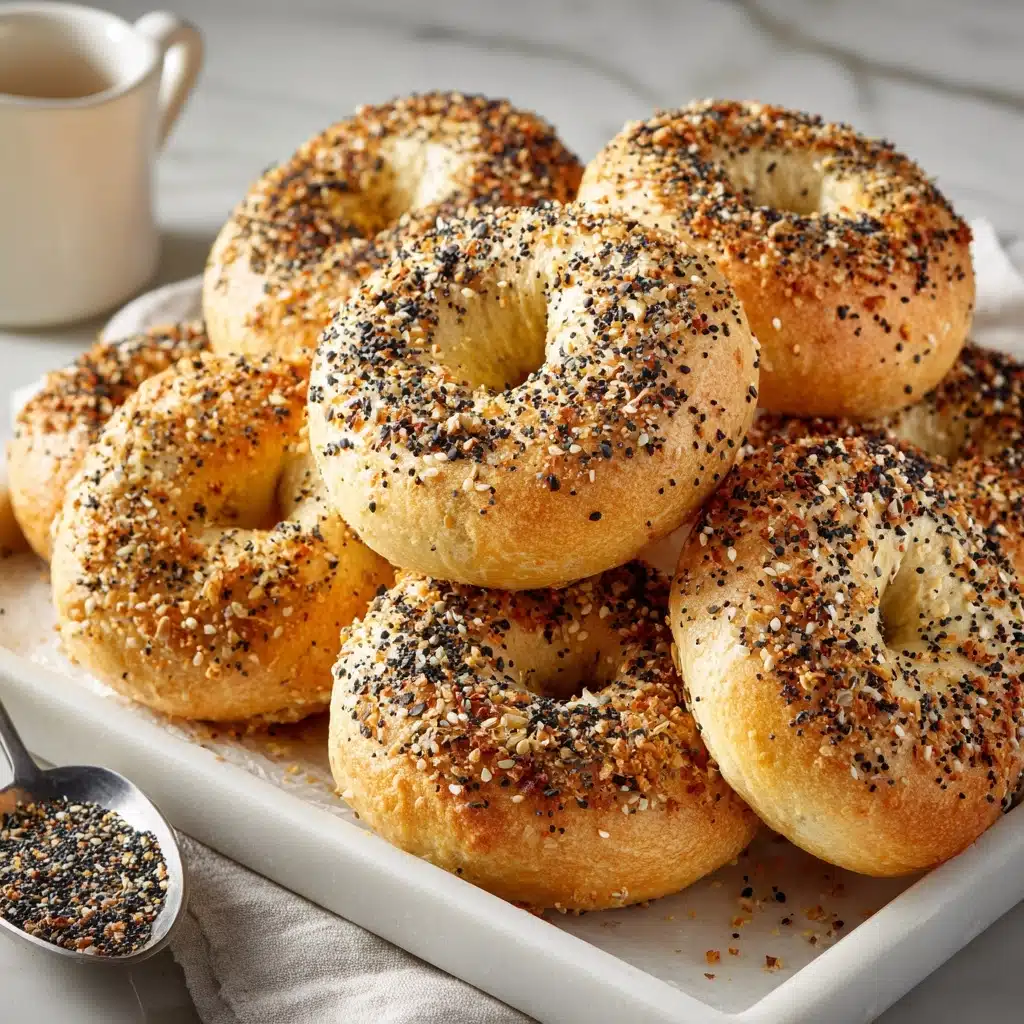
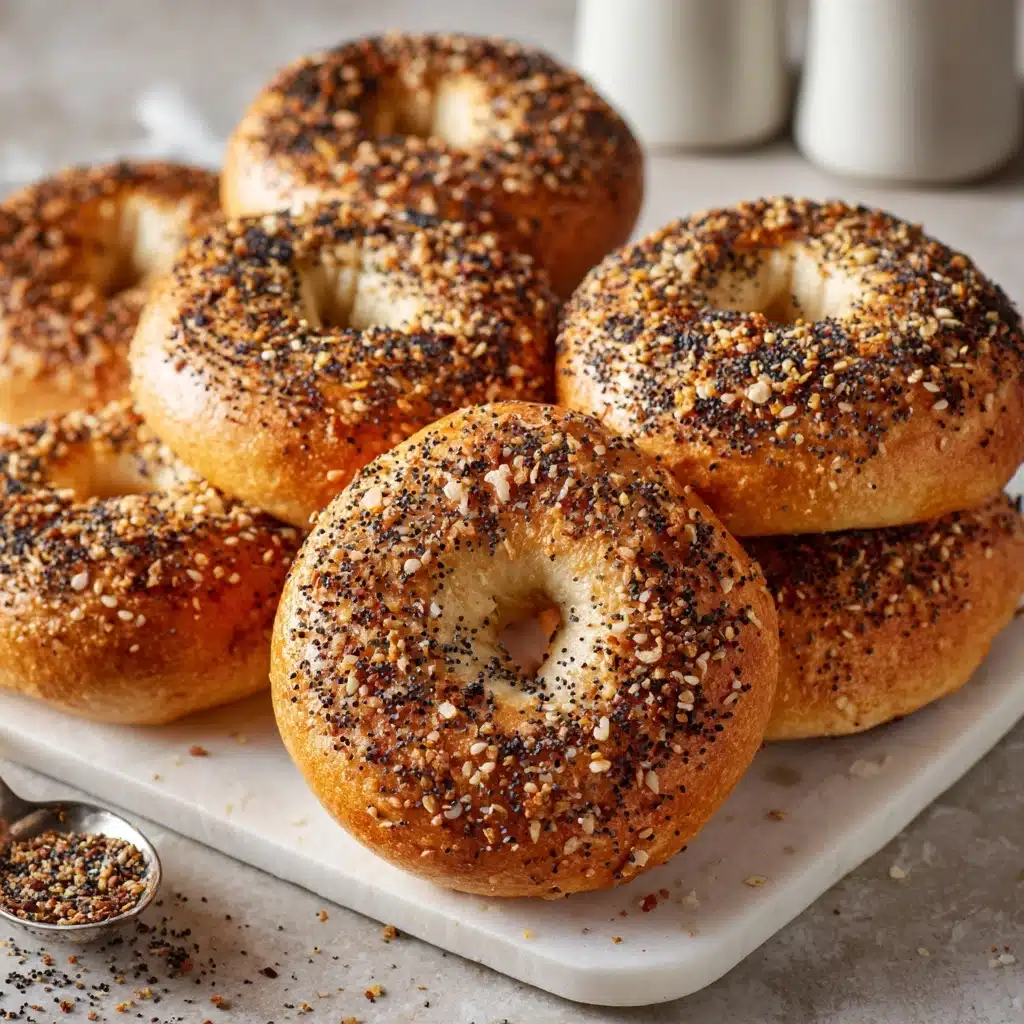
Homemade Everything Bagels Recipe
If you have ever dreamed of creating bakery-quality bagels right in your own kitchen, this recipe for Homemade Everything Bagels is here to make that dream come true. Nothing beats the satisfying chewy texture, the perfectly crisp crust, and that addictive blend of sesame seeds, poppy seeds, dried onion, and garlic all sprinkled generously on top. These bagels are perfect for weekend brunch gatherings, deli-style sandwiches, or just a special snack to brighten your day. Once you try making these homemade delights, you’ll never want to settle for store-bought again.
Ingredients You’ll Need
Trust me on this: simple ingredients are the magic behind these tasty bagels. Each one plays a crucial role, whether it’s helping form that chewy dough or creating the iconic textured crust that makes an everything bagel so crave-worthy.
- Bread flour, 4 ⅔ cups: Provides a strong gluten structure essential for the classic chewy bagel bite.
- Granulated sugar, 3 tablespoons (divided): Adds a subtle sweetness and helps with crust color when boiling and baking.
- Instant yeast, 2 teaspoons: The workhorse that makes your dough rise beautifully and develop great flavor.
- Kosher salt, 2 teaspoons: Balances flavors and strengthens the dough overall.
- Warm water, 1 ⅔ cups: Activates the yeast and hydrates the flour to form a soft dough.
- Egg white + water for egg wash: Gives your bagels a shiny golden exterior that holds toppings in place.
- Everything bagel seasoning, 3 tablespoons: The famous topping combo of sesame seeds, poppy seeds, dried onion, and garlic that adds irresistible punch.
How to Make Homemade Everything Bagels
Step 1: Mix and Knead the Dough
Begin by combining the bread flour, a tablespoon of sugar, instant yeast, and kosher salt in a large bowl or stand mixer. Slowly add the warm water while mixing on low speed until you get a shaggy dough. Then, turn it out onto a smooth surface and knead until the dough becomes soft and elastic, about 3 to 4 minutes. If it feels sticky, just add a little flour; if too stiff, splash in some extra water. This step is so satisfying — you can feel the bagel magic coming together beneath your hands!
Step 2: First Rise
Pop your dough into a lightly greased bowl, cover it with plastic wrap, and let it rise in a cozy spot for about 60 to 90 minutes. The dough will double in size, becoming airy and ready to transform into bagels. This is where anticipation builds — you’re one step closer to warm, fresh bagels.
Step 3: Shape the Bagels
After the rise, gently transfer the dough to your work surface and divide it into ten equal pieces. If you’re a perfectionist, weigh them out evenly, but eyeballing works wonderfully here too. Roll each piece into a smooth ball and then use your thumb to poke a hole through the center, stretching it wide because your bagels will puff up quite a bit. Cover them with a clean towel and let them rest for 20 minutes. I love this part, where those little dough rounds begin to feel like actual bagels.
Step 4: Boil for the Perfect Crust
While your bagels rest, preheat your oven to 425°F and bring a pot of water mixed with sugar to a boil. Boiling your bagels for 45 to 60 seconds on each side is key; this step locks in moisture and sets the crust structure. When they float to the top, that’s a good sign that your dough is perfectly risen and ready for baking. Use a slotted spoon to fish them out, shaking off excess water as you transfer them onto parchment-lined baking sheets.
Step 5: Egg Wash and Everything Topping
Whisk together egg white and water to create a glossy egg wash, then brush it generously over each bagel to help the everything seasoning stick and give that golden finish. Sprinkle the seasoning mix all over—don’t be shy, the more the merrier! You can also gently dip the wet bagels into the seasoning for even coverage.
Step 6: Bake Until Golden Brown
Bake your bagels for about 20 to 22 minutes, flipping and rotating the pans halfway through to ensure even cooking. The result is a batch of stunning golden bagels with perfectly crusty edges and a chewy, chewy center. Let them cool fully before slicing — I promise, the wait is worth it.
How to Serve Homemade Everything Bagels

Garnishes
While the classic everything seasoning is a showstopper, serving your bagels with a spread of cream cheese—plain or flavored with herbs, chives, or smoked salmon bits—takes things to the next level. Avocado slices or a smear of tangy hummus also complement the bagel’s bold seasoning wonderfully.
Side Dishes
Pair your Homemade Everything Bagels with fresh fruit salad or a light green salad for a balanced brunch. For a heartier option, crispy bacon or scrambled eggs are always crowd-pleasers. The bagels’ robust flavor stands up perfectly to these simple sides, making your meal feel full and satisfying.
Creative Ways to Present
Turn these bagels into mini sandwiches by stuffing them with deli meats, cheeses, sprouts, and tangy mustard or your favorite spread. Another fun idea is making breakfast sliders with scrambled eggs and cheddar. For entertaining, slice bagels into rounds, toast them, and top with smoked salmon, capers, and crème fraîche for a chic appetizer.
Make Ahead and Storage
Storing Leftovers
If you have any of these incredible bagels left over (though they often don’t last long!), store them in an airtight container or resealable plastic bag at room temperature for up to two days. Keeping them sealed helps maintain that delightful chewiness without drying out.
Freezing
Bagels freeze wonderfully and make a great option for quick breakfasts. Wrap each bagel tightly in plastic wrap and then place them in a freezer-safe bag. They’ll keep at their best for up to three months. When you want a fresh-tasting bagel in minutes, just grab one from the freezer!
Reheating
The key to reviving these bagels is toasting. Slice them and toast directly from frozen or at room temperature until warm and crisp. If you want to replicate that just-baked softness, sprinkle a little water on the cut side and briefly warm them in the oven wrapped in foil.
FAQs
Can I make these bagels without a stand mixer?
Absolutely! While a stand mixer with a dough hook makes kneading easier, you can mix the ingredients by hand and knead the dough on your countertop. It just requires a little more elbow grease but the results are just as delicious.
Why do I need to boil bagels before baking?
Boiling bagels creates a slightly gelatinized crust that bakes up shiny and chewy, which is the hallmark of true bagels. It also helps control how thick or thin the crust becomes — a longer boil yields a thicker crust.
What if my bagels don’t float during boiling?
If your bagels sink, it usually means the dough hasn’t risen quite enough. Cover the unboiled bagels and let them rest for another 10 minutes, then try boiling again. That float test is a great way to check if they’re ready.
Can I use all-purpose flour instead of bread flour?
You can, but bread flour is preferred because of its higher protein content which gives the bagels their signature chewiness. All-purpose flour will produce a softer, less dense bagel texture.
How long do homemade bagels keep fresh?
Freshly baked bagels are at their best eaten the same day but can be stored at room temperature for up to two days without losing much quality. After that, freezing is your best bet to maintain freshness.
Final Thoughts
Making Homemade Everything Bagels is such a rewarding experience, especially when that first warm bite reveals the perfect crust and chewy center crowned with zesty seasoning. Whether you enjoy them plain, with your favorite spreads, or stuffed with tasty fillings, these bagels are guaranteed to brighten your table and impress your family or friends. Give this recipe a try—it just might become your new favorite baking ritual!