
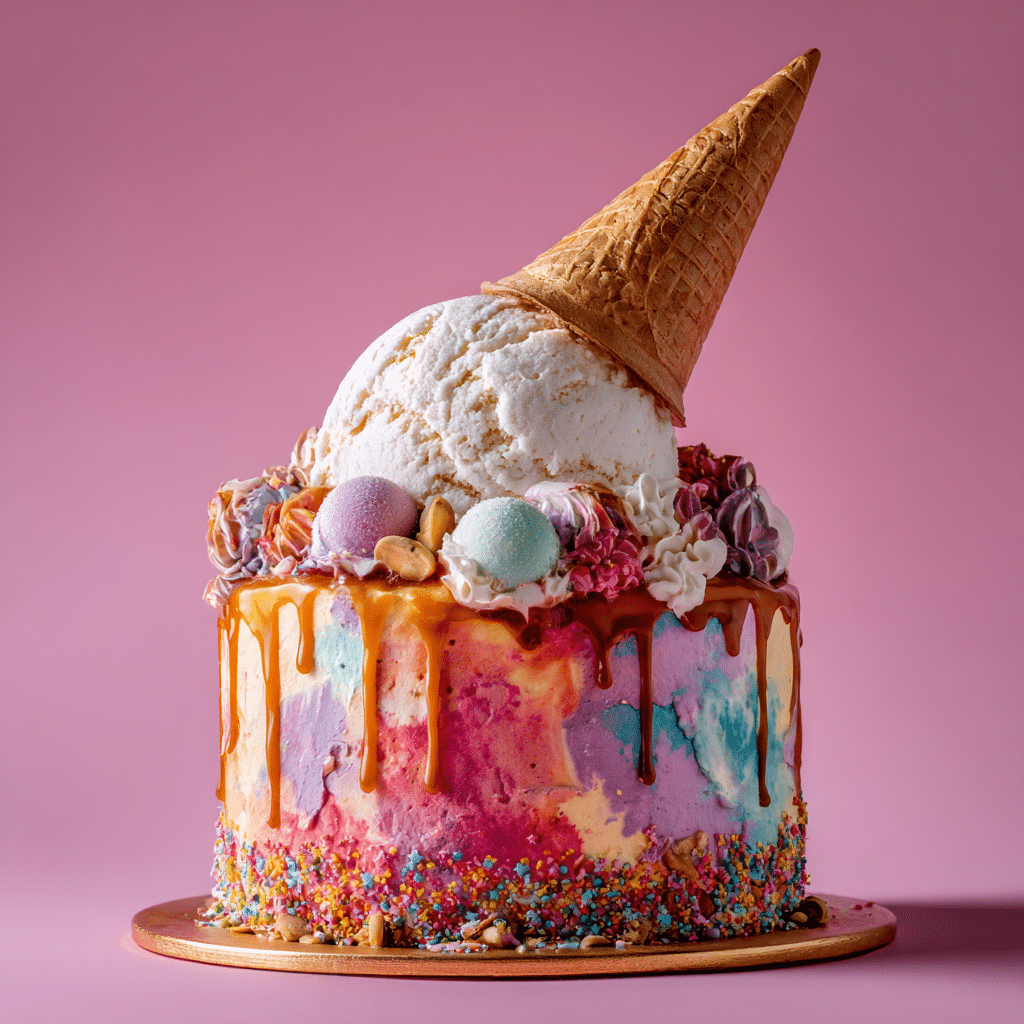
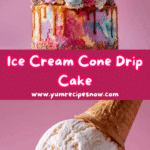
Ice Cream Cone Drip Cake
Print
Ice Cream Cone Drip Cake
A fun and whimsical cake decorated to look like melting ice cream cones on top. Perfect for birthdays or summer parties.
- Prep Time: 45 mins
- Cook Time: 30 mins
- Total Time: 1 hr 15 mins
- Yield: 12 servings 1x
- Category: Dessert
- Method: Baking
- Cuisine: American
- Diet: Vegetarian
Ingredients
Scale
- 2 9-inch round vanilla cakes, baked and cooled
- 2 cups buttercream frosting (various colors if desired)
- 1 cup white chocolate chips or candy melts
- Pink or colored food coloring
- 3–4 sugar ice cream cones
- Sprinkles, for decoration
- 1/2 cup heavy cream (for ganache)
- 1 cup semi-sweet chocolate chips (for ganache)
Instructions
- Level the cakes and stack them with buttercream in between each layer on a cake board.
- Apply a crumb coat of frosting and chill the cake for 30 minutes.
- Apply a final layer of frosting and smooth the surface.
- Make the chocolate ganache by heating the heavy cream until warm and pouring it over chocolate chips. Stir until smooth.
- Let ganache cool slightly, then drip it over the edges of the cake using a spoon or squeeze bottle.
- Melt white chocolate or candy melts and tint with food coloring. Pour small amounts on top of the cake to create the look of melted ice cream.
- Fill ice cream cones with frosting and place them upside down on the cake to look like they’re dripping.
- Decorate with sprinkles and extra frosting as desired.
- Chill until ready to serve.
Notes
- You can use any flavor of cake or frosting to customize.
- Colored candy melts work well for the “drip” effect.
- Cones can be filled with cake scraps or extra frosting for stability.
Nutrition
- Serving Size: 1 slice
- Calories: 480
- Sugar: 42g
- Sodium: 210mg
- Fat: 26g
- Saturated Fat: 15g
- Unsaturated Fat: 9g
- Trans Fat: 0g
- Carbohydrates: 58g
- Fiber: 1g
- Protein: 4g
- Cholesterol: 60mg
Keywords: Ice Cream Cone Drip Cake, birthday cake, summer cake, drip cake, fun cake design

