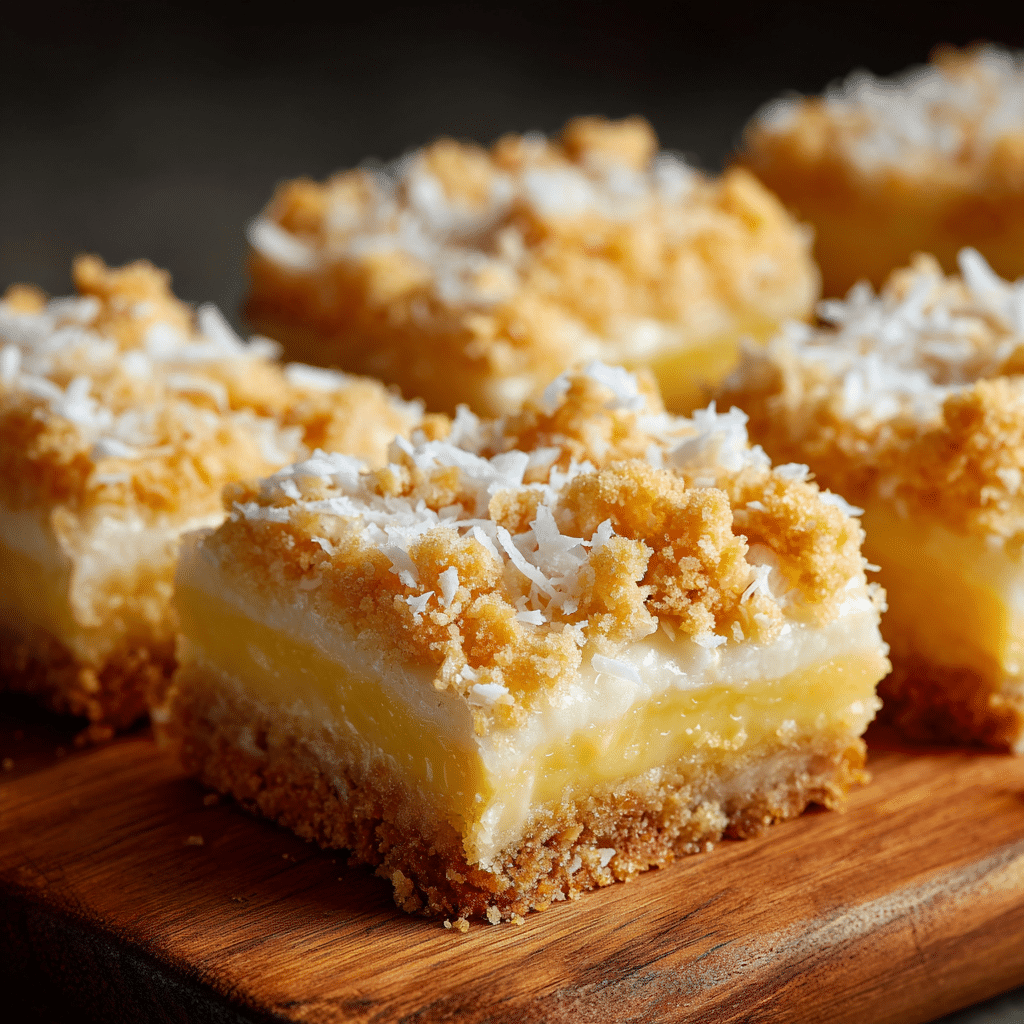
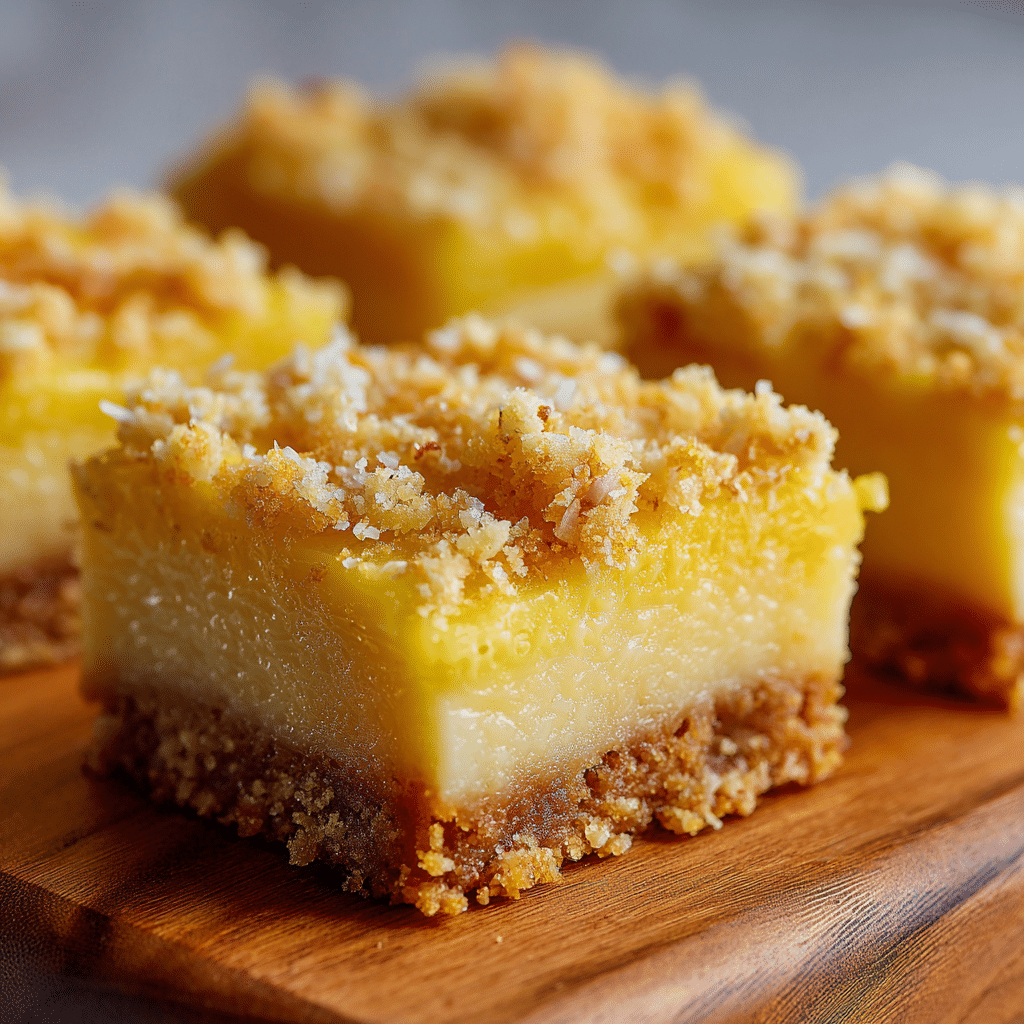
Lemon Coconut No-Bake Bars Recipe
If you’re looking to brighten your day with something refreshingly sweet, the Lemon Coconut No-Bake Bars are an absolute treasure. These bars perfectly blend the zesty tang of lemon with the tropical warmth of coconut, all nestled on a crisp biscuit base that requires no oven time. Light, creamy, and incredibly easy to make, this treat feels like sunshine on your taste buds and is ideal for any occasion where you want to impress without stress. Once you try these delightfully tangy, creamy, and crunchy bars, you’ll find yourself coming back to them again and again.
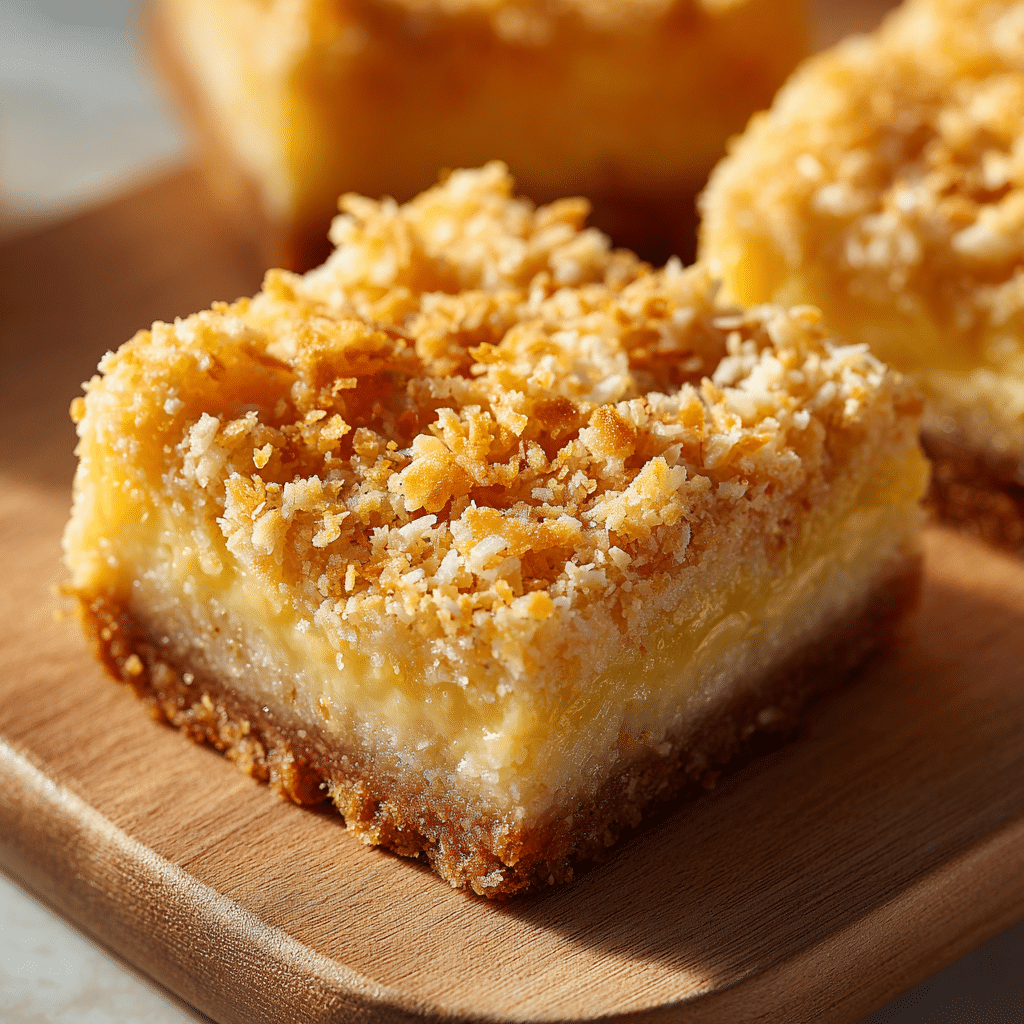
Ingredients You’ll Need
The magic of Lemon Coconut No-Bake Bars lies in their simplicity. Each ingredient plays a vital role: the buttery crushed biscuits form a perfect crunchy foundation, the lemon curd provides that vibrant citrus punch, whipped cream adds airy richness, and shredded coconut delivers a lovely texture and tropical aroma. Together, they create a harmonious balance of flavors and textures that’s hard to resist.
- 1 cup crushed biscuits: Use your favorite plain biscuits or graham crackers for a crisp, flavorful base that holds everything together.
- 2 tablespoons butter: Melts into the crushed biscuits, bringing richness and helping to bind the base solidly.
- 1/2 cup lemon curd: Bursting with lemony zest and natural sweetness, this adds that signature tang that makes the bars pop.
- 1/2 cup whipped cream: Light and fluffy, it balances the tart lemon curd with creamy smoothness.
- 1/4 cup shredded coconut: Sprinkled on top for a lovely texture contrast and subtle tropical flavor.
How to Make Lemon Coconut No-Bake Bars
Step 1: Create the Crunchy Base
Start by combining your crushed biscuits with melted butter, mixing until the crumbs are evenly coated. Press this mixture firmly into the bottom of your tray to form an even, compact layer. This crunchy base not only provides texture but also supports the creamy layers to come, so pack it down well for a sturdy foundation.
Step 2: Add the Luscious Lemon Curd Layer
Next, spread the lemon curd evenly over the biscuit base. This step is where the bright citrus flavor comes alive, giving the bars their delightful zing. Be gentle as you spread to avoid disturbing the base layer underneath, ensuring each bite bursts with that refreshing lemon taste.
Step 3: Top with Light, Fluffy Whipped Cream
Carefully dollop the whipped cream over the lemon curd, then gently smooth it out into an even layer. This creamy topping softens the tartness of the lemon curd and adds a luscious texture that will melt in your mouth.
Step 4: Sprinkle with Shredded Coconut and Chill
Finish the bars by sprinkling a generous layer of shredded coconut on top. Not only does this add a beautiful visual touch, but it also introduces a subtle crunch and sweet tropical flavor. Once complete, pop your bars into the fridge and chill for at least two hours. This step is crucial for setting the layers and ensuring a clean slice when serving.
How to Serve Lemon Coconut No-Bake Bars
Garnishes
Enhance presentation by adding thin lemon zest ribbons or a few whole toasted coconut flakes on top. These simple garnishes elevate the bars and hint at the flavors inside, making your dessert look as inviting as it tastes.
Side Dishes
Lemon Coconut No-Bake Bars pair wonderfully with a fresh berry salad or a light green tea. Their sweet-tart profile complements fruity, delicate sides that won’t overpower the bars’ distinctive lemon and coconut taste.
Creative Ways to Present
For a fun twist, serve the bars in mini mason jars layered with extra lemon curd and whipped cream, creating individual parfait-style desserts. Alternatively, cut them into bite-sized cubes and skewer with mint leaves for easy, elegant finger food.
Make Ahead and Storage
Storing Leftovers
Keep any leftover Lemon Coconut No-Bake Bars covered tightly in the refrigerator. Stored this way, they will stay fresh and moist for up to three days, making them a perfect make-ahead treat or quick dessert for unexpected guests.
Freezing
If you want to make a batch in advance, these bars freeze beautifully. Wrap them individually or in airtight containers and freeze for up to one month. When ready to enjoy, thaw in the refrigerator overnight to maintain their creamy texture and vibrant flavors.
Reheating
Since these bars are best served chilled, reheating isn’t necessary. However, if you prefer them slightly softer, allow them to sit at room temperature for about 15 minutes before serving—this lets the layers gently soften without losing their structure.
FAQs
Can I use a different type of cookie for the base?
Absolutely! While plain biscuits or graham crackers work best for their neutral flavor, you can experiment with digestive biscuits or even ginger snaps for added spice. Just keep in mind how the flavor might interact with the lemon and coconut.
Is it possible to make these bars vegan?
Yes! Substitute dairy butter with a plant-based margarine and use coconut cream whipped until fluffy in place of the whipped cream. For lemon curd, look for vegan versions or try making your own with aquafaba and lemon juice.
How tart are the Lemon Coconut No-Bake Bars?
They strike a wonderful balance between tart and sweet. The lemon curd delivers a bright, zesty tang, which is mellowed beautifully by the creamy whipped layer and the sweet, toasty coconut topping.
Can I make these bars without refrigeration?
While you could assemble them without chilling, refrigeration is key for the bars to firm up and the flavors to meld. Without chilling, they may be too soft to slice cleanly and won’t hold their shape as well.
What is the best way to cut the bars cleanly?
Use a sharp knife warmed slightly under hot water, then wiped dry. This warms the blade just enough to glide through the layers smoothly, giving you clean edges without crushing the delicate topping.
Final Thoughts
If you want a dessert that feels both indulgent and refreshingly light, these Lemon Coconut No-Bake Bars are your new best friend. They’re quick to prepare, require no baking, and bring together wonderful textures and flavors that are sure to brighten up your dessert table. I promise, once you try them, you’ll be excited to share this little sunshine-in-a-bar with everyone you know.