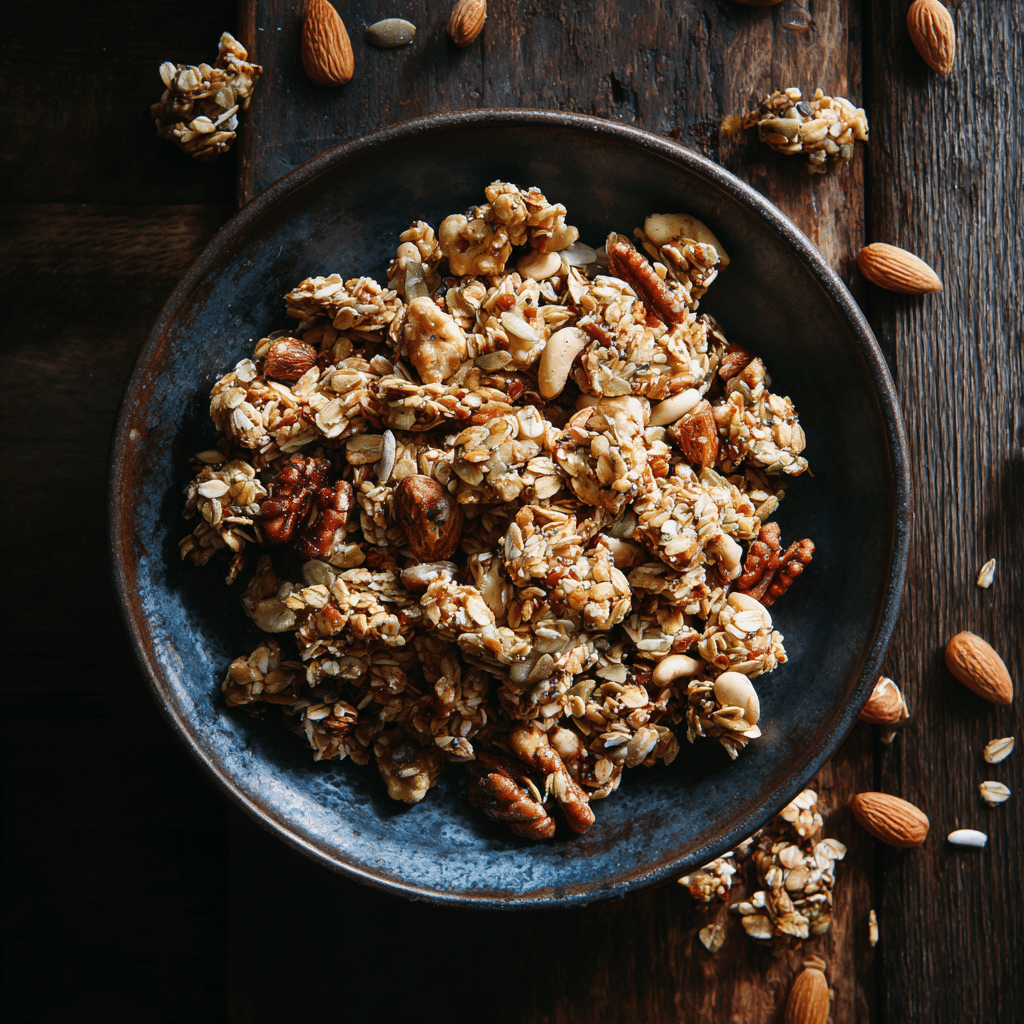
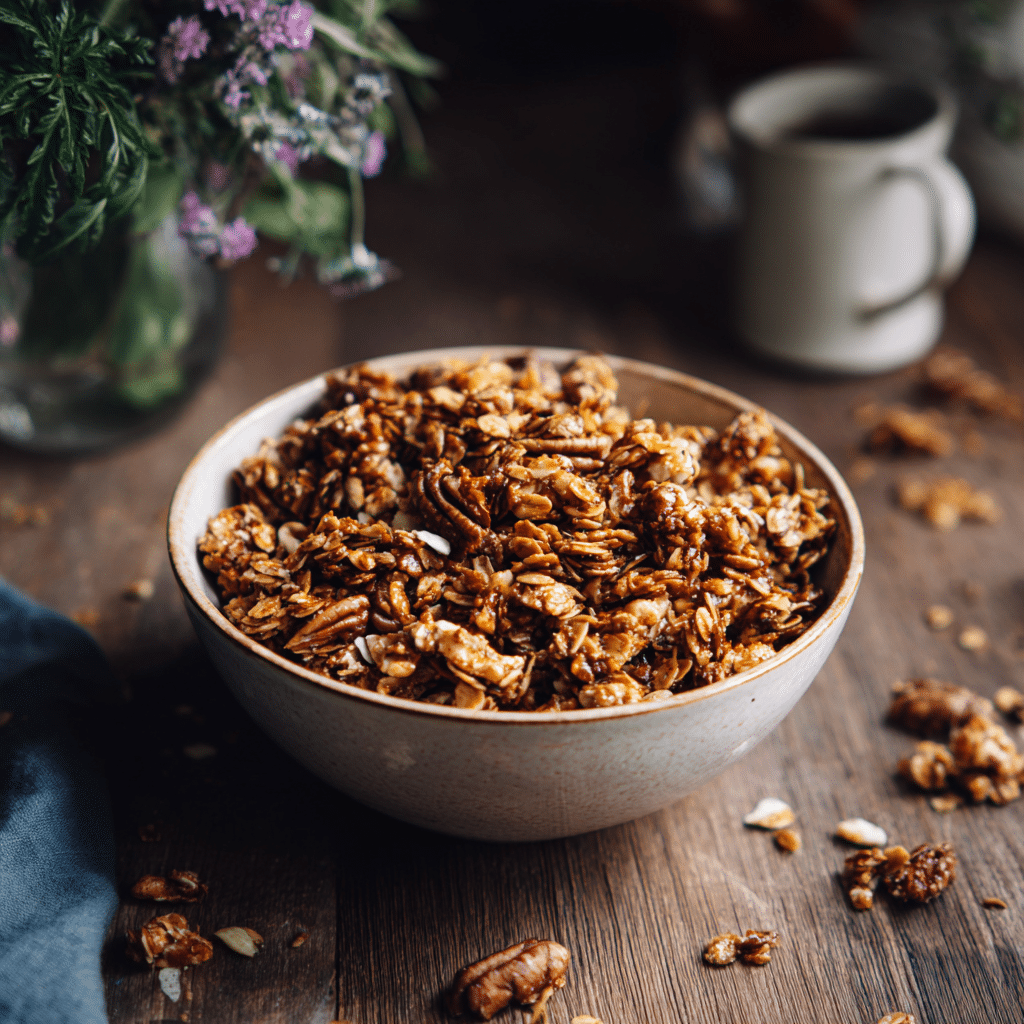
Maple Granola Recipe
If you are craving a cozy breakfast or snack that brings both crunch and a touch of sweetness, this Maple Granola recipe will quickly become your new favorite. With its perfect combination of rolled oats, pecans, and a warm blend of maple syrup and spices, this homemade granola is irresistibly flavorful. It’s simple to make, boasting crisp clusters that are perfect over yogurt, with milk, or just by the handful when you need a satisfying treat. The magic lies in how the maple syrup and a hint of maple extract infuse every bite with that cozy, comforting taste that feels like autumn all year round.
Ingredients You’ll Need
Gathering high-quality but straightforward ingredients lays the foundation for this delicious Maple Granola. Each component plays a vital role, whether adding crunchy texture, rich flavor, or the perfect balance of sweetness and spice.
- Oats: 4 cups of old-fashioned rolled oats form the hearty, chewy base of the granola.
- Pecans: 1 cup of roughly chopped pecans brings a buttery crunch and nuttiness.
- Sliced almonds: ½ cup adds lighter crunch and nuttiness that complements the pecans.
- Kosher salt: Just ¼ teaspoon enhances the overall flavors and balances sweetness.
- Ground cinnamon: ½ teaspoon provides warmth and subtle spice that feels cozy.
- Brown sugar: ¼ cup adds caramel notes and helps create crunchy clusters.
- Coconut or canola oil: ½ cup melted oil helps bind the ingredients and contribute to a crisp texture.
- Maple syrup: ½ cup of real maple syrup infuses every oat and nut with that signature sweet aroma and flavor.
- Vanilla extract: ½ teaspoon adds depth and rounds out the sweetness.
- Maple extract: 2 teaspoons enhance the maple flavor for a richer taste.
How to Make Maple Granola
Step 1: Prep and Combine Dry Ingredients
Start by preheating your oven to 300°F and lining a baking sheet with parchment paper to prevent sticking. In a large mixing bowl, whisk together your oats, chopped pecans, sliced almonds, kosher salt, and ground cinnamon. This makes sure every bite will have a balanced mix of crunchy nuts and oats, perfectly spiced before the wet ingredients join in.
Step 2: Mix Wet Ingredients
In a spouted measuring cup or small bowl, combine the brown sugar, melted coconut or canola oil, maple syrup, vanilla extract, and the maple extract. Stir until everything is well blended. Each ingredient helps coat the granola pieces for flavor and that beautiful golden color once baked.
Step 3: Combine and Coat
Pour the wet mixture over the dry oat and nut mixture. Use a wooden spoon or spatula to mix thoroughly, making sure every oat flake and nut chunk is lightly coated with the maple-infused syrup. This sticky coating is what binds everything together and gives you those famously crisp clusters you’re after!
Step 4: Bake to Perfection
Spread the coated granola evenly on your prepared baking sheet. Bake for about 30 minutes, stirring carefully and turning the pan halfway through baking. This ensures even toasting and brings out the deep, rich flavor and crunch we love. When golden and fragrant, pull it from the oven and let it cool undisturbed—it will crisp up even more as it cools.
Step 5: Optional Extras
Once cooled, feel free to mix in extras like chocolate chips or flaked coconut for some fun variations. These additions can add sweetness or texture, but the classic maple granola is perfect on its own.
How to Serve Maple Granola
Garnishes
Sprinkle your maple granola over creamy Greek yogurt or dollops of fresh fruit puree for a simple yet indulgent breakfast or snack. Fresh berries, banana slices, or a drizzle of additional maple syrup can elevate the experience beautifully.
Side Dishes
This granola pairs wonderfully with smooth, cold milk or your favorite plant-based alternative for a classic breakfast bowl. It’s also a fantastic side to warm oatmeal or chia pudding, giving contrasting textures and a touch of sweetness.
Creative Ways to Present
Try layering your maple granola in parfait glasses with layers of yogurt and fruit for an elegant yet effortless dessert or brunch dish. You can also mix it into homemade trail mix or sprinkle onto smoothie bowls for extra crunch and flavor.
Make Ahead and Storage
Storing Leftovers
Store homemade maple granola in an airtight container at room temperature to keep it perfectly crisp and flavorful for up to two weeks. Keeping moisture out is key to maintaining that beautiful crunch.
Freezing
If you want to make a big batch and save some for later, maple granola freezes very well. Simply place it in a zip-top freezer bag or airtight container and freeze for up to three months. Thaw at room temperature before using.
Reheating
If your granola softens over time, a quick re-toast in the oven at 275°F for about 5 to 10 minutes can help restore its crispiness and refresh those warm, toasty flavors.
FAQs
Can I use other nuts instead of pecans and almonds?
Absolutely! Walnuts, cashews, or hazelnuts work wonderfully in this Maple Granola and will add their own unique flavor and crunch. Just be sure to chop larger nuts for even baking.
Is it possible to make this recipe vegan?
Yes, this recipe is naturally vegan if you use pure maple syrup and a plant-based oil like coconut or canola oil. Make sure any optional add-ins, like chocolate chips, are also vegan if you want to keep it fully plant-based.
How do I get crunchy clusters in my granola?
The secret is coating the oats and nuts thoroughly with the maple syrup and oil mixture and baking evenly at a low temperature. Stirring halfway through prevents burning but encourages clumping for those delicious clusters.
Can I substitute maple syrup with honey?
You can swap maple syrup with honey if you like, but note it will change the flavor profile. Honey is sweeter and less woody, so your granola will taste different—but still delicious.
How long does homemade maple granola last?
Stored airtight at room temperature, maple granola stays fresh up to two weeks. Outside moisture is the enemy of crunch, so be sure your container seals well.
Final Thoughts
Maple Granola is such a simple yet deeply satisfying treat that brightens breakfasts and snacks with its perfect balance of sweet, nutty, and cinnamon-spiced flavors. Once you make it at home, you’ll appreciate how easy it is to customize and how good it tastes fresh out of the oven. I hope you enjoy baking and sharing this cozy recipe as much as I do — it truly is a little batch of comfort that delights every time!