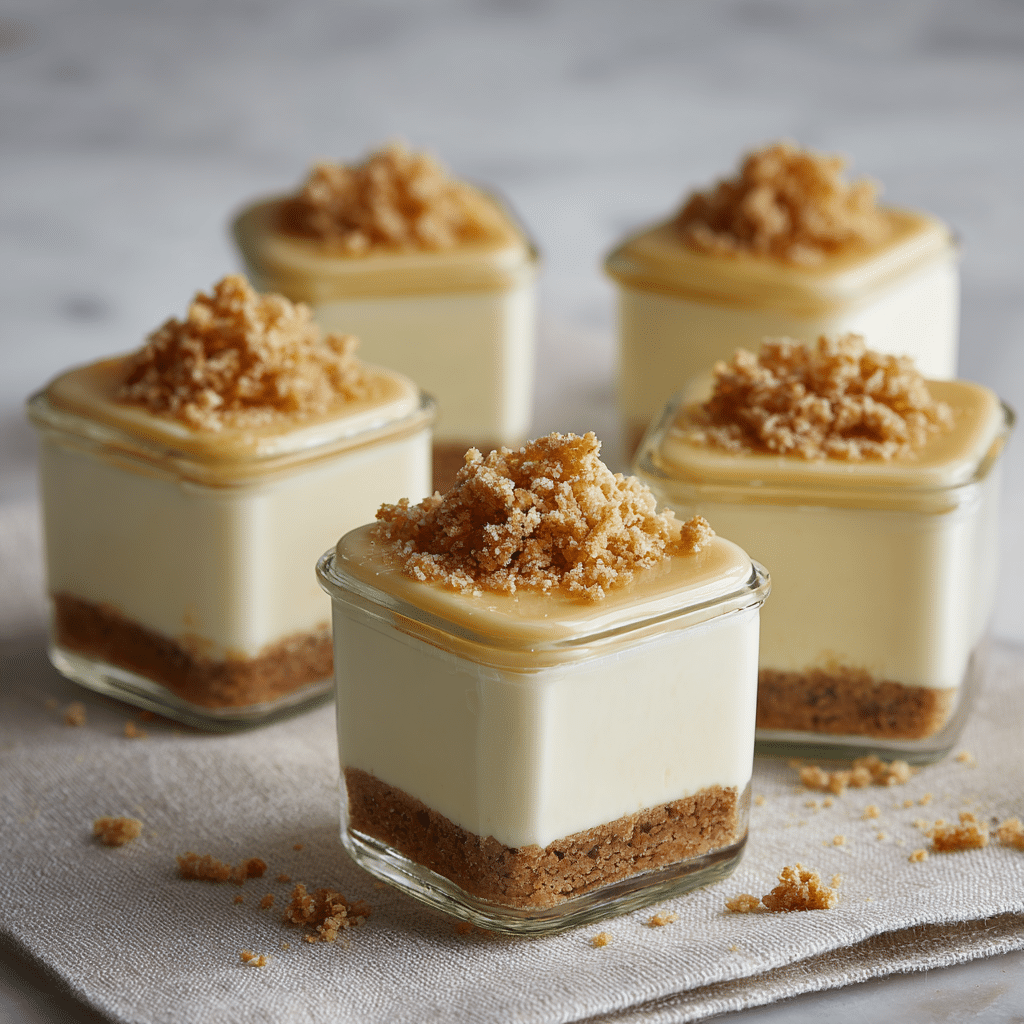
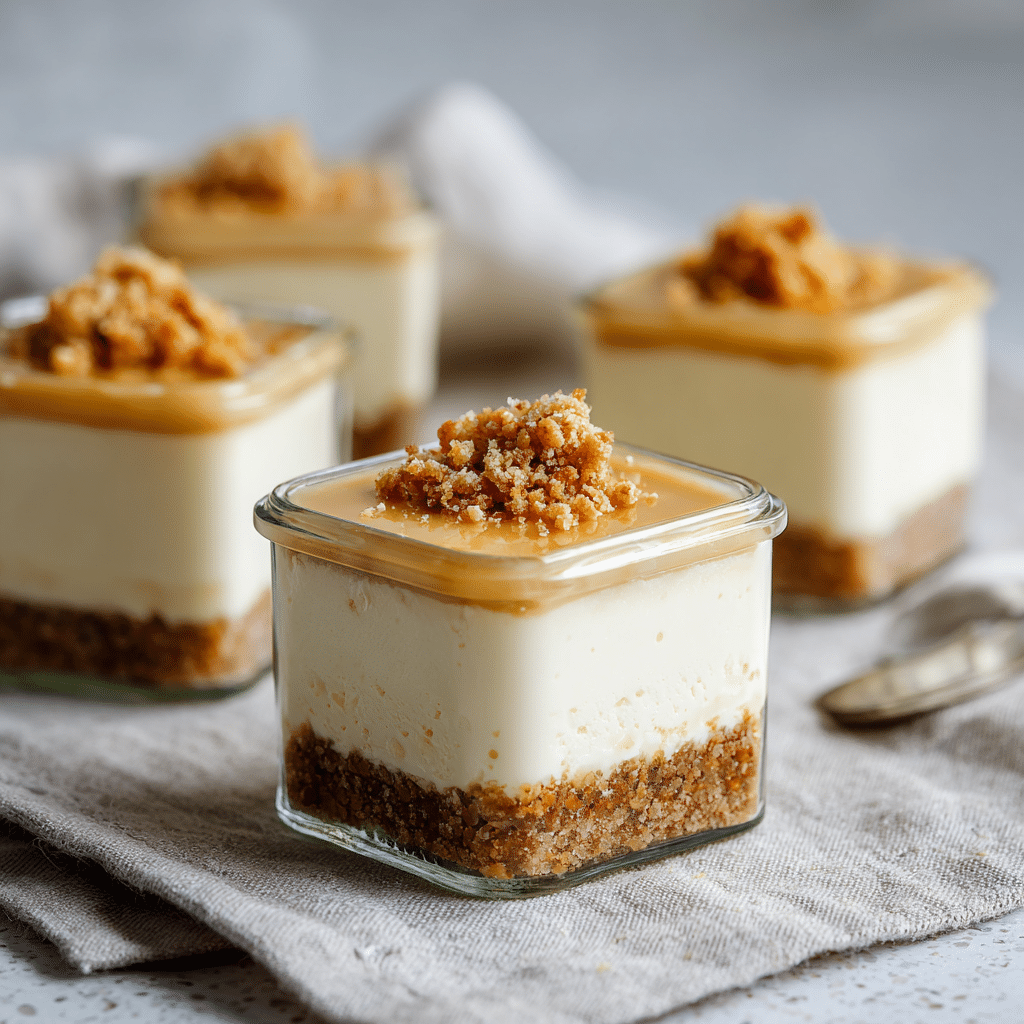
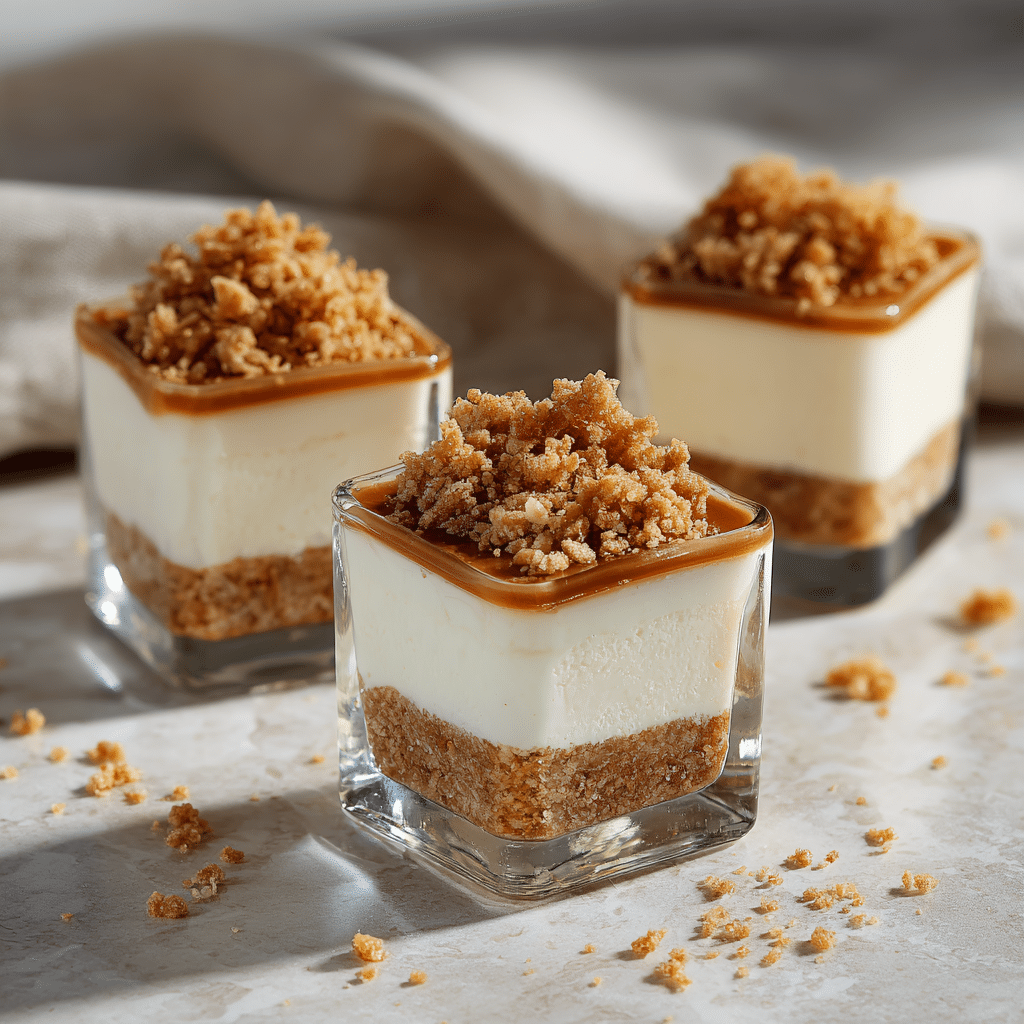
No-Bake Lotus Cheesecake Cups Recipe
If you are craving a dessert that feels indulgent yet is incredibly easy to put together, these No-Bake Lotus Cheesecake Cups are exactly what you need. This creamy, layered delight combines the buttery crunch of crushed biscuits with smooth, velvety cream cheese and that iconic caramelized Lotus spread topping. Every spoonful feels like a small celebration of comfort and sweetness without the fuss of baking, making it perfect for a quick treat, a fancy dinner party, or anytime you want to impress with minimal effort.
Ingredients You’ll Need
This recipe is wonderfully straightforward, relying on a handful of simple ingredients that come together to create something truly special. Each component plays a vital role: the biscuits provide texture, the cream cheese and whipped cream create that silky cheesecake base, sugar balances the flavors with subtle sweetness, and the Lotus spread adds its signature caramelized richness and depth.
- 1 cup crushed biscuits: Choose your favorite buttery biscuits for the best crunch and flavor foundation.
- 1 cup cream cheese: Softened cream cheese ensures a smooth and creamy cheesecake texture.
- 1/2 cup whipped cream: Folding this in lightens the cheesecake filling making it airy and luscious.
- 1/4 cup sugar: Adds just the right amount of sweetness without overpowering the flavors.
- 1/3 cup Lotus spread: The star ingredient that brings that iconic caramelized, spiced note to the topping.
How to Make No-Bake Lotus Cheesecake Cups
Step 1: Prepare the Cream Cheese Mixture
Begin by softening your cream cheese to room temperature for easy mixing. In a bowl, beat the cream cheese and sugar until smooth and silky. This forms the rich base of your cheesecake layer that is essential for that luscious texture.
Step 2: Fold in the Whipped Cream
Next, gently fold the whipped cream into the cream cheese mixture. The key here is to keep the airiness intact, so use a spatula and fold carefully to create a light and fluffy cream that melts in your mouth.
Step 3: Layer the Crushed Biscuits and Cream
It’s time to assemble! Take your serving cups and add a layer of crushed biscuits at the bottom. Then spoon a generous layer of the cream mixture on top, smoothing it out evenly. Repeat if your cups are tall enough for an extra layer, ending with cream on top to hold the Lotus spread.
Step 4: Top with Lotus Spread
Finally, dollop the Lotus spread on the top layer of cream. This heavenly caramelized Lotus topping adds a luxurious finish and signature flavor to your cheesecake cups. You can swirl it gently for a marbled effect or keep it as a thick topper.
Step 5: Chill Before Serving
Cover the cups and refrigerate for at least 2 hours. The chilling step is crucial as it allows all the layers to set beautifully, enhancing the textures and melding the flavors into those perfect No-Bake Lotus Cheesecake Cups.
How to Serve No-Bake Lotus Cheesecake Cups
Garnishes
To make your No-Bake Lotus Cheesecake Cups even more inviting, go for garnishes that complement but don’t overpower. A sprinkle of crushed biscuits, a drizzle of extra Lotus spread, or a few shavings of white chocolate give a polished look and extra texture that’s impossible to resist.
Side Dishes
These cheesecake cups are ideal as a standalone dessert, but pairing them with fresh fruit—like sliced strawberries or a handful of raspberries—adds a bright contrast. For a cozy coffee pairing, a strong espresso or chai latte intensifies the caramel and spice notes perfectly.
Creative Ways to Present
Try serving your No-Bake Lotus Cheesecake Cups layered in clear glasses, parfait-style. This way, all the textures and colors can be admired before the first bite. You could also try mini mason jars or even edible chocolate cups for a fun twist that’s as delightful to look at as it is to eat.
Make Ahead and Storage
Storing Leftovers
Store any leftover No-Bake Lotus Cheesecake Cups in airtight containers in the refrigerator. These cups keep very well for up to 3 days, maintaining their creamy texture and flavor perfectly, so you can enjoy them without rush.
Freezing
If you want to prepare these cups well in advance, freezing is possible. Place them in freezer-safe containers, and freeze for up to 1 month. When ready to eat, thaw overnight in the refrigerator to preserve the texture and the delicate layering of the cheesecake cups.
Reheating
Since these cheesecake cups are meant to be served chilled, reheating is not recommended. Instead, just allow frozen cups to thaw thoroughly in the fridge for a refreshing and creamy dessert experience every time.
FAQs
Can I use a different type of biscuit for the base?
Absolutely! While buttery biscuits work best for that classic texture and flavor, you can experiment with graham crackers, digestive biscuits, or even spiced cookies depending on your taste preferences.
Is it possible to make No-Bake Lotus Cheesecake Cups vegan?
Yes, you can substitute the cream cheese with vegan cream cheese and use coconut whipped cream instead of traditional whipped cream. Be sure your Lotus spread is also vegan-friendly to keep the flavors true.
How long do the cheesecake cups need to chill before serving?
Chill them for at least 2 hours to allow the layers to set properly. For the best texture, overnight chilling is ideal and will really enhance the creaminess and flavor melding.
Can these cups be made without whipped cream?
While whipped cream lightens the texture, you can omit it if needed. However, the cheesecake layer will be denser and less airy, which might change the overall mouthfeel a bit.
What’s the best way to crush the biscuits?
Place the biscuits in a zip-top bag and use a rolling pin to crush them evenly. This method keeps things tidy and lets you control the biscuit size for the perfect crunchy base.
Final Thoughts
There’s something truly satisfying about the ease and deliciousness of No-Bake Lotus Cheesecake Cups. Whether you’re serving them to guests or sneaking a special treat for yourself, these cups blend simple ingredients into a dreamy dessert that comes together effortlessly. Trust me, once you try this recipe, it will quickly become a beloved go-to for any occasion—just as it is in my kitchen!