No-Bake Oreo Balls Recipe
If you love quick, decadent treats that satisfy your sweet tooth without turning on the oven, these No-Bake Oreo Balls are an absolute dream come true. Imagine rich, creamy centers made from crushed Oreos and smooth cream cheese, coated in a glossy layer of melted chocolate—each bite is a delightful contrast of textures and flavors. They come together effortlessly, making them perfect for any occasion, whether it’s a casual snack or a party dessert that’ll impress everyone. Once you try these No-Bake Oreo Balls, they’ll become a favorite go-to when you want something indulgent but fuss-free.
Ingredients You’ll Need
The magic of these No-Bake Oreo Balls lies in their simplicity. With just a handful of ingredients, each plays a crucial role in creating that perfect balance of flavor and texture. From the iconic crunch and chocolaty goodness of Oreos to the silky creaminess of cream cheese and finally the rich coating of melted chocolate, every element works harmoniously.
- 2 cups crushed Oreo cookies: Provides the unmistakable chocolate flavor and crunchy base—you can pulse them in a food processor for even consistency.
- 1/2 cup cream cheese: Adds a creamy, smooth texture and helps bind the mixture together perfectly.
- 1 cup melted chocolate: Coats the balls in a shiny, decadent shell; choose milk, dark, or white chocolate depending on your preference.
How to Make No-Bake Oreo Balls
Step 1: Combine the Oreos and Cream Cheese
Start by crushing the Oreo cookies into fine crumbs — this step is crucial because you want the mixture to hold together well but still have some texture. Mix these crumbs with the cream cheese in a bowl until the mixture is smooth and fully combined, forming a dough-like consistency. This creamy base is what gives the No-Bake Oreo Balls their irresistibly soft center.
Step 2: Shape Into Bite-Sized Balls
Once your mixture is ready, use your hands or a small cookie scoop to shape it into uniform balls about 1 inch in diameter. If the mixture feels too sticky, chill it for 10-15 minutes to make handling easier. This step is where the fun really begins because these little orbs of yumminess are already begging to be devoured.
Step 3: Dip in Melted Chocolate
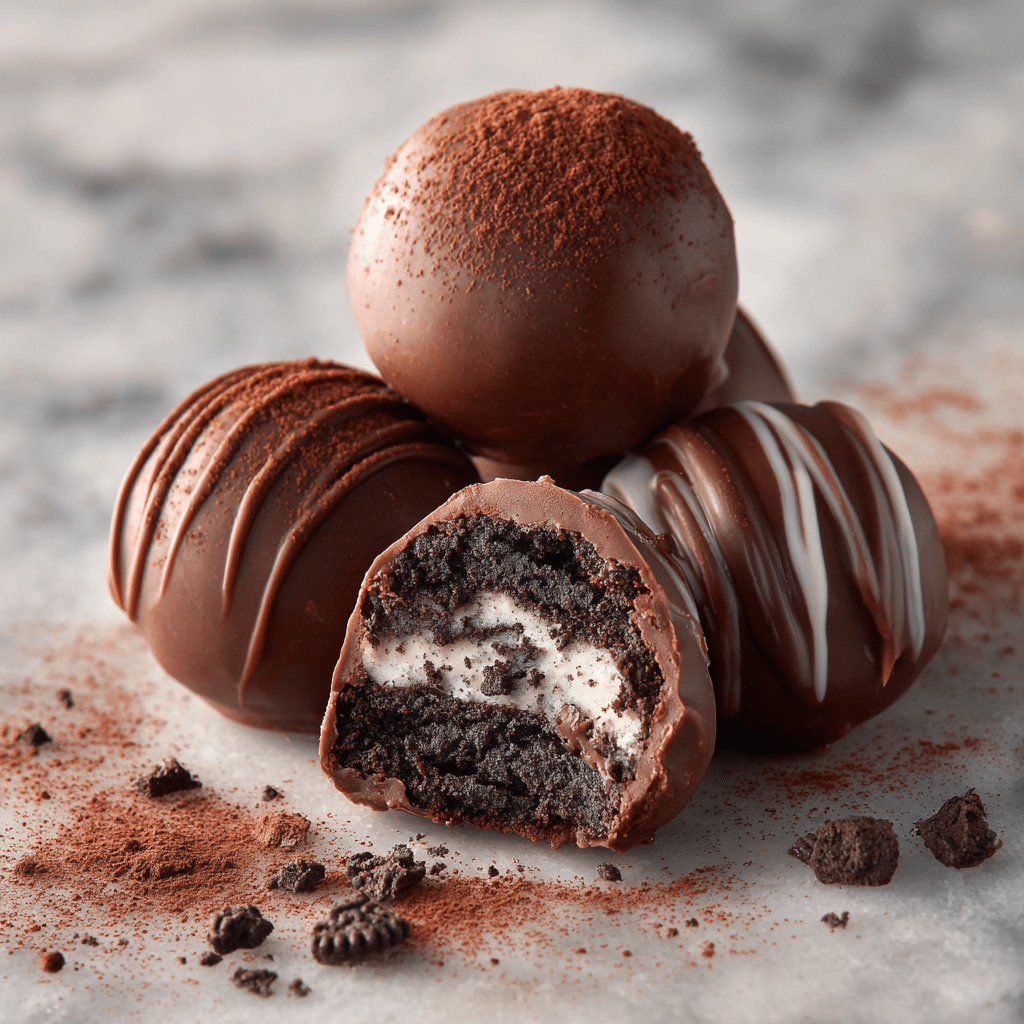
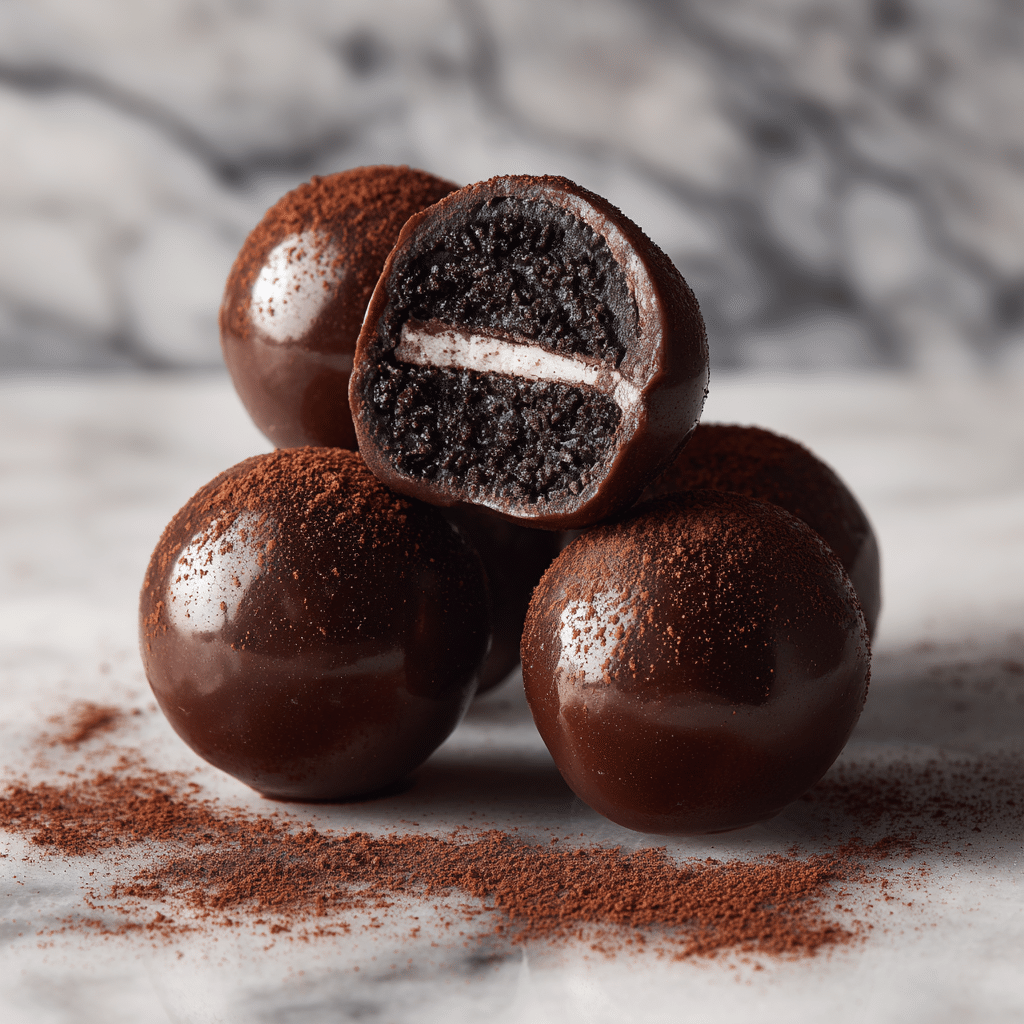
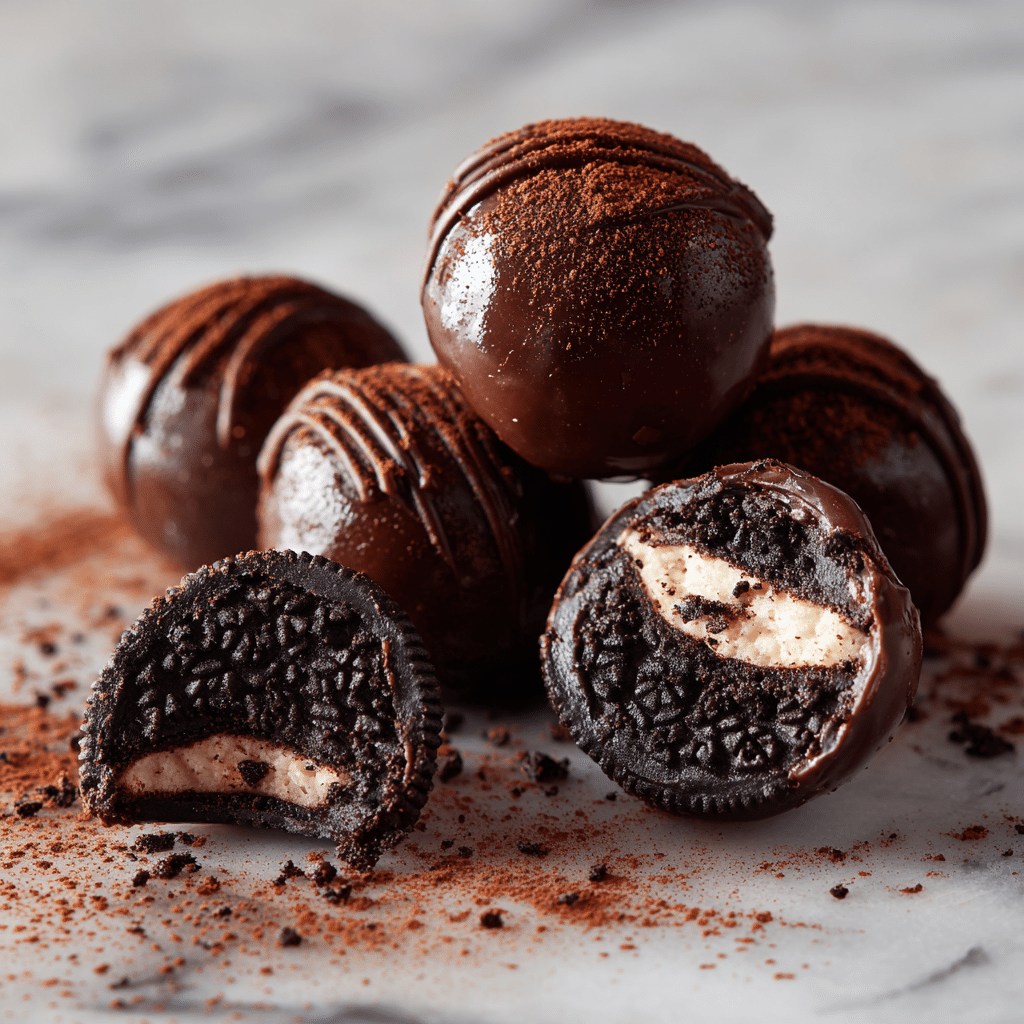
Next, gently dip each Oreo ball into the melted chocolate, making sure it’s fully coated. Use a fork to lift them out and tap off any excess chocolate so you get a smooth finish. The melted chocolate shell adds a crisp layer that beautifully contrasts the creamy center, giving every bite a satisfying crunch and sweetness.
Step 4: Chill Until Set
Place the dipped Oreo balls on a parchment-lined tray and refrigerate for at least 30 minutes to allow the chocolate to harden. This final step ensures your No-Bake Oreo Balls are perfectly firm on the outside while remaining luxuriously soft inside, ready to be enjoyed whenever cravings strike.
How to Serve No-Bake Oreo Balls
Garnishes
Looking to add a little extra flair? Sprinkle crushed Oreos or colorful sprinkles onto the chocolate coating before chilling for a playful touch. You can also drizzle white or dark chocolate over the balls for a beautiful marbled effect that looks as good as it tastes.
Side Dishes
Pair your No-Bake Oreo Balls with a glass of cold milk or a hot cup of coffee or tea to balance their sweetness. They also work wonderfully alongside fresh fruit platters or a scoop of vanilla ice cream for a delightful dessert experience.
Creative Ways to Present
For parties or gifts, arrange the Oreo balls in a decorative box or on a pretty platter lined with parchment paper. You can even place them in mini cupcake liners for adorable individual servings. Adding a personalized touch like a ribbon or a fun note makes this treat even more special.
Make Ahead and Storage
Storing Leftovers
You can store any leftover No-Bake Oreo Balls in an airtight container in the refrigerator for up to a week. Keeping them chilled preserves their texture and flavor, so they’re just as enjoyable the next day or later in the week.
Freezing
Want to keep these tasty treats on hand? Freeze your No-Bake Oreo Balls on a baking sheet first until solid, then transfer them to a freezer-safe bag or container. They freeze beautifully for up to 3 months. When ready to enjoy, thaw them in the refrigerator for a few hours before serving.
Reheating
These little delights are best served cold or at room temperature, so reheating isn’t necessary. Letting frozen balls thaw naturally in the fridge preserves their creamy center and crisp chocolate coating without any loss in quality.
FAQs
Can I use a different type of cookie instead of Oreos?
Absolutely! While traditional Oreos give that classic flavor, you can experiment with other chocolate sandwich cookies or even flavored varieties to create your own twist on No-Bake Oreo Balls.
Is it necessary to use cream cheese?
Yes, cream cheese is essential for binding the crushed cookies together and giving the balls their creamy texture. It also adds a slight tang that balances the sweetness perfectly.
What kind of chocolate works best for coating?
Any melting chocolate—milk, dark, or white—works well. Choose based on your flavor preference, but make sure to melt it gently to avoid burning and ensure a smooth coating.
Can I make No-Bake Oreo Balls vegan?
To make them vegan, use dairy-free cream cheese and vegan-friendly chocolate. Just make sure the cookies you use are also free from animal products.
How long do No-Bake Oreo Balls last?
Stored properly in the refrigerator, they stay fresh for up to a week, making them perfect for preparing ahead of time for any occasion.
Final Thoughts
No-Bake Oreo Balls are the kind of treat that brings instant joy with minimal effort. They’re creamy, crunchy, and covered in chocolate—a combination that never fails. Whether you’re looking to whip up a quick dessert or delight guests with a bite-sized indulgence, this recipe will become one of your favorites to turn to again and again. Trust me, once you try these little chocolate-coated wonders, you’ll wonder why you didn’t make them sooner!