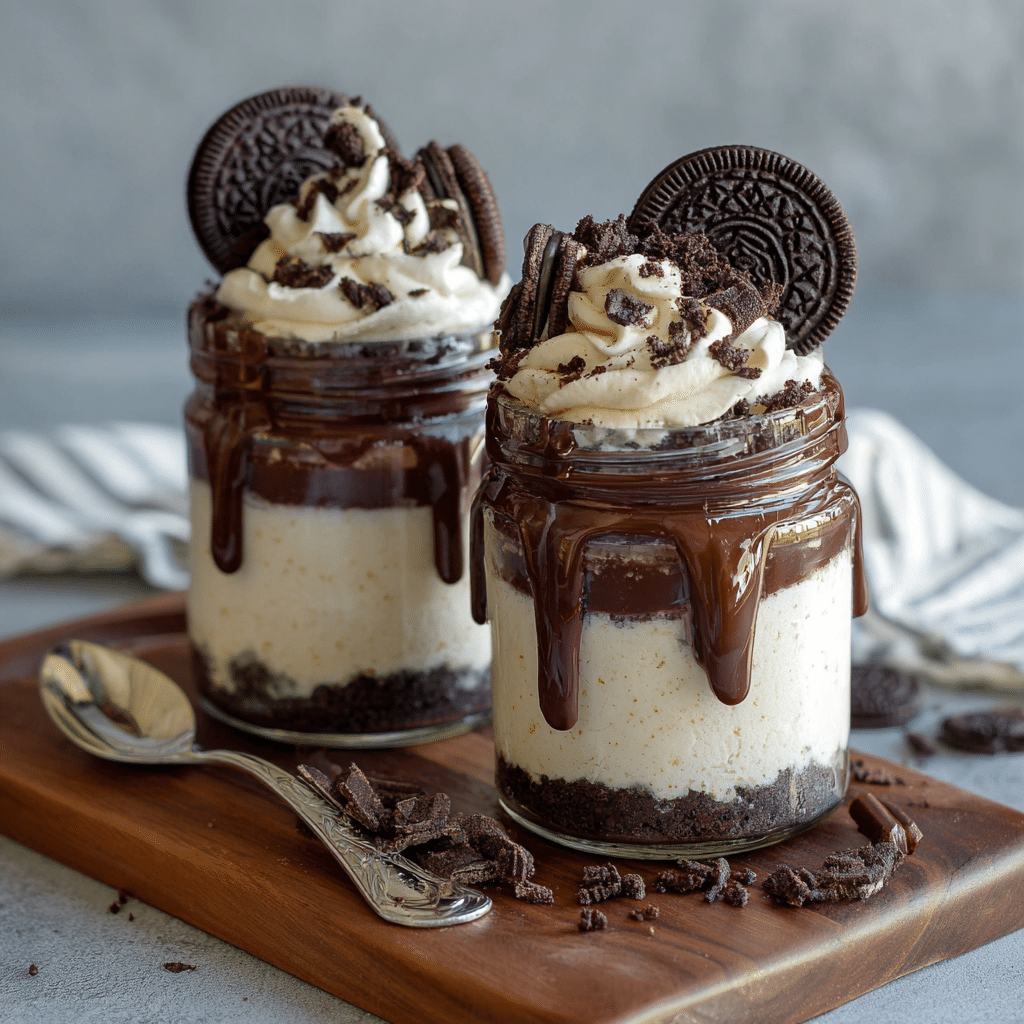
Oreo Cheesecake Jars Recipe
If you’re on the hunt for a dessert that’s as delightful to look at as it is to eat, these Oreo Cheesecake Jars are an absolute game-changer. This easy-to-make treat combines the rich, velvety cream cheese mixture with the irresistible crunch of Oreo cookie crumbs, all layered neatly in charming individual jars. Perfect for impressing guests or simply indulging yourself on a cozy night in, these jars offer a luscious balance of creamy sweetness and chocolatey texture that will have you coming back for seconds. The simplicity of assembly coupled with their elegant presentation makes Oreo Cheesecake Jars a must-try for any dessert lover.

Ingredients You’ll Need
Gathering the right ingredients is the first step toward making these irresistible Oreo Cheesecake Jars. Each ingredient plays a vital role, from the buttery Oreo crust providing a satisfying crunch to the creamy filling delivering that classic cheesecake flavor and light whipped cream to keep the dessert airy and delightful.
- Oreo cookies, 12 crushed: Provides a delicious chocolatey crunch and the perfect base for the cheesecake layers.
- Butter, 2 tablespoons melted: Binds the crushed Oreos together so the crust holds firmly in the jars.
- Cream cheese, 250g: The star of the filling, offering a rich and creamy texture essential for cheesecake.
- Whipped cream, 1/2 cup: Adds a light, fluffy contrast to the dense cream cheese for a balanced mouthfeel.
- Sugar, 1/4 cup: Sweetens the filling just enough to enhance the flavors without overpowering the Oreos.
How to Make Oreo Cheesecake Jars
Step 1: Prepare the Oreo Crust
Start by crushing the Oreo cookies into fine crumbs; you can use a food processor or place them in a ziplock and smash gently with a rolling pin. Then mix the crumbs with the melted butter until everything looks evenly moistened. This mixture will form the delightful crunchy base you’ll layer in each jar.
Step 2: Make the Cream Cheese Filling
In a mixing bowl, combine the cream cheese and sugar, whipping them until smooth and creamy with no lumps. Then gently fold in the whipped cream to lighten the mixture, creating that classic cheesecake texture that’s both rich and airy.
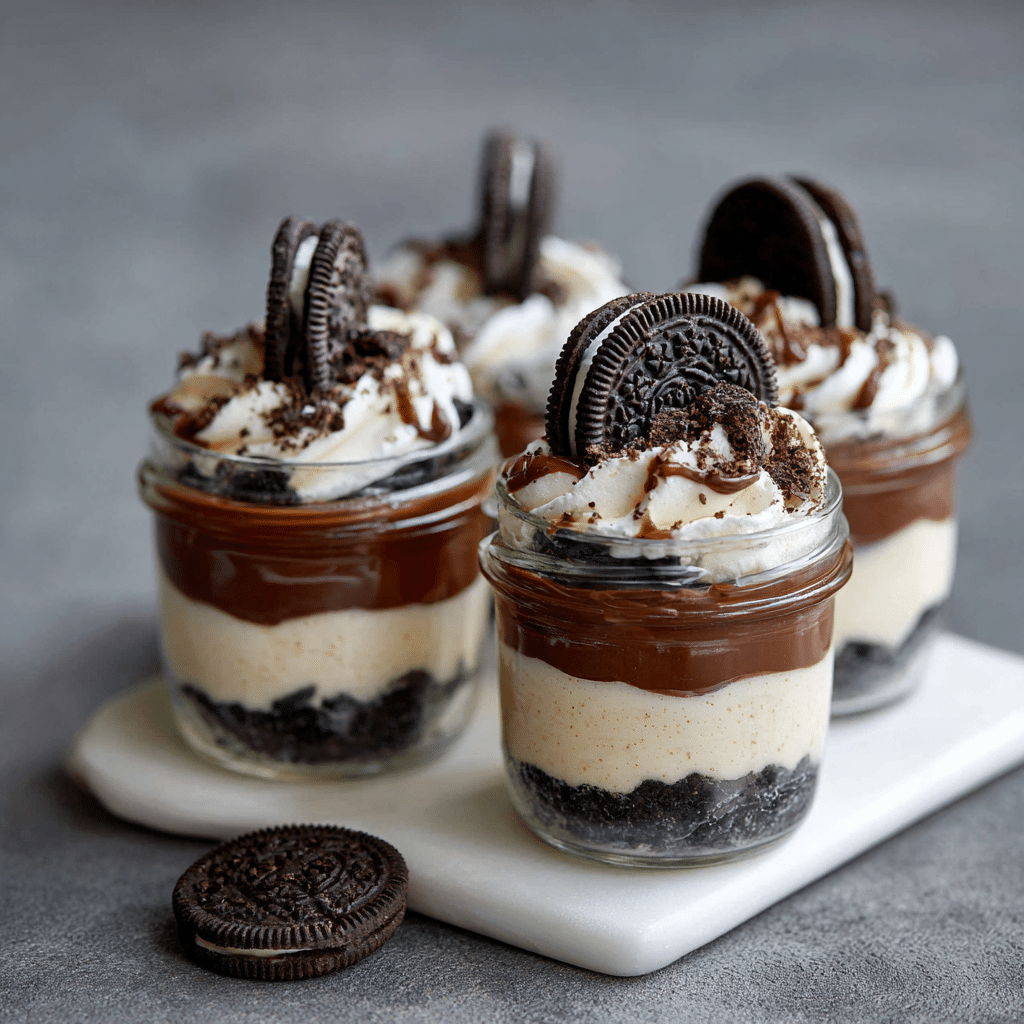
Step 3: Assemble the Jars
Take your jars and start by spooning in a layer of the Oreo crust mixture at the bottom. Follow this with a generous layer of the cream cheese filling, then repeat to create multiple layers if your jar size allows. Ending with cream cheese on top is a solid choice, but adding a little whipped cream layer at the end gives extra fluffiness and visual appeal.
Step 4: Chill Before Serving
Once assembled, cover the jars and pop them into the refrigerator for at least 2 hours. This chilling step allows the layers to set perfectly and meld the flavors, resulting in a luscious dessert that’s both firm enough to hold its shape and wonderfully creamy in every bite.
How to Serve Oreo Cheesecake Jars
Garnishes
To elevate these jars to next-level deliciousness, consider topping with crushed Oreo pieces for added texture or a drizzle of chocolate sauce for that extra indulgence. Fresh berries or a sprinkle of cocoa powder also add beautiful contrast and a fresh twist to each serving.
Side Dishes
While these Oreo Cheesecake Jars shine perfectly on their own, pairing them with a cup of strong coffee or a refreshing glass of milk can enhance the experience, balancing sweetness and providing a comforting accompaniment that complements the rich flavors.
Creative Ways to Present
Presenting Oreo Cheesecake Jars in clear mason jars or small glass containers not only showcases the beautiful layers but also makes them incredibly portable for picnics or parties. For a fun twist, try serving them in chocolate cups or small parfait glasses to impress guests with an unexpected presentation.
Make Ahead and Storage
Storing Leftovers
Once prepared, Oreo Cheesecake Jars can be stored in the refrigerator for up to 3 days. Make sure they are tightly sealed to prevent any fridge odors from creeping in and to maintain the creamy texture and freshness of the dessert.
Freezing
If you want to keep these jars longer, you can freeze them for up to a month. However, it’s best to freeze without the whipped cream topping, adding fresh whipped cream once thawed for the best texture. Thaw them overnight in the refrigerator before serving for creamy, delicious results.
Reheating
This dessert is best enjoyed cold, so reheating isn’t recommended. The delicate texture of the cream cheese filling and whipped cream can change if heated. Instead, give them ample time to thaw naturally in the fridge for perfect results.
FAQs
Can I use a different type of cookie instead of Oreos?
Absolutely! While Oreos are classic and offer a great chocolate flavor, you can experiment with other cookies like chocolate chip, graham crackers, or even ginger snaps for a unique twist on the Oreo Cheesecake Jars.
Is it necessary to chill the jars for 2 hours?
Chilling allows the layers to set and the flavors to meld, which really improves the taste and texture. While you could serve them sooner, the jars won’t hold their shape as well and might seem less flavorful.
Can I make these jars dairy-free or vegan?
Yes! Use a dairy-free cream cheese alternative and coconut whipped cream to create a vegan-friendly version. Just be sure the substitutions blend well and have a similar texture for the best results.
How large should the jars be?
Small to medium-sized jars, around 6 to 8 ounces, work perfectly for individual servings. They’re big enough to showcase the layers and allow for a good portion without being too heavy.
Can I add toppings inside the jars?
Definitely! Adding chocolate chips, mini marshmallows, or even a swirl of caramel or fudge inside the layers adds a fun surprise and extra flavor, making your Oreo Cheesecake Jars even more special.
Final Thoughts
Making Oreo Cheesecake Jars is such a joyful and rewarding experience, especially when you get to enjoy the result with friends or family. Their balance of creamy cheesecake and crunchy Oreos wrapped in a charming jar makes dessert feel special and effortless. Give this recipe a try—you might find yourself making these jars a regular part of your dessert lineup!