
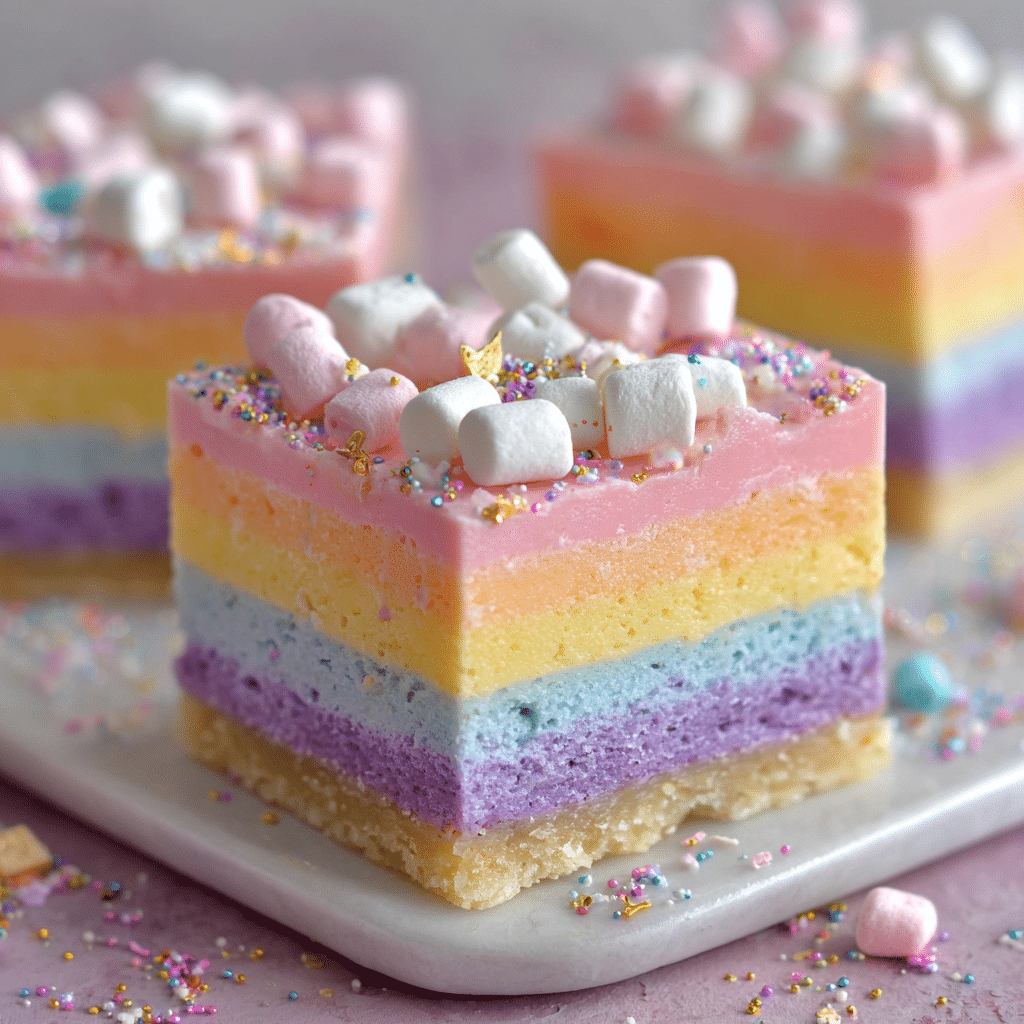
Rainbow Fudge Squares
Print
Rainbow Fudge Squares
Colorful and creamy rainbow fudge squares made with layers of tinted white chocolate fudge. A fun and festive treat perfect for parties or holidays.
- Prep Time: 30 minutes
- Cook Time: 10 minutes
- Total Time: 2 hours 40 minutes
- Yield: 36 squares 1x
- Category: Dessert
- Method: No-Bake
- Cuisine: American
- Diet: Vegetarian
Ingredients
Scale
- 3 cups white chocolate chips
- 1 can (14 ounces) sweetened condensed milk
- 1/4 teaspoon salt
- 1 teaspoon vanilla extract
- Food coloring (red, orange, yellow, green, blue, purple)
- Butter or nonstick spray (for greasing pan)
Instructions
- Line an 8×8-inch pan with parchment paper and lightly grease it with butter or nonstick spray.
- In a saucepan, melt the white chocolate chips with sweetened condensed milk and salt over low heat, stirring constantly until smooth.
- Remove from heat and stir in the vanilla extract.
- Divide the mixture evenly into six bowls.
- Add a different food coloring to each bowl to create red, orange, yellow, green, blue, and purple layers.
- Pour the purple layer into the prepared pan and spread evenly. Chill in the refrigerator for about 10 minutes or until set.
- Repeat with blue, green, yellow, orange, and red layers, chilling each layer before adding the next.
- Once all layers are added and set, chill the fudge completely for at least 2 hours.
- Remove from the pan and cut into squares to serve.
Notes
- You can use gel food coloring for more vibrant colors.
- Make sure each layer is firm before adding the next to prevent mixing.
- Store in an airtight container in the refrigerator for up to a week.
Nutrition
- Serving Size: 1 square
- Calories: 120
- Sugar: 16g
- Sodium: 35mg
- Fat: 5g
- Saturated Fat: 3g
- Unsaturated Fat: 1g
- Trans Fat: 0g
- Carbohydrates: 18g
- Fiber: 0g
- Protein: 1g
- Cholesterol: 5mg
Keywords: rainbow fudge, layered fudge, white chocolate fudge, colorful dessert, party treat


