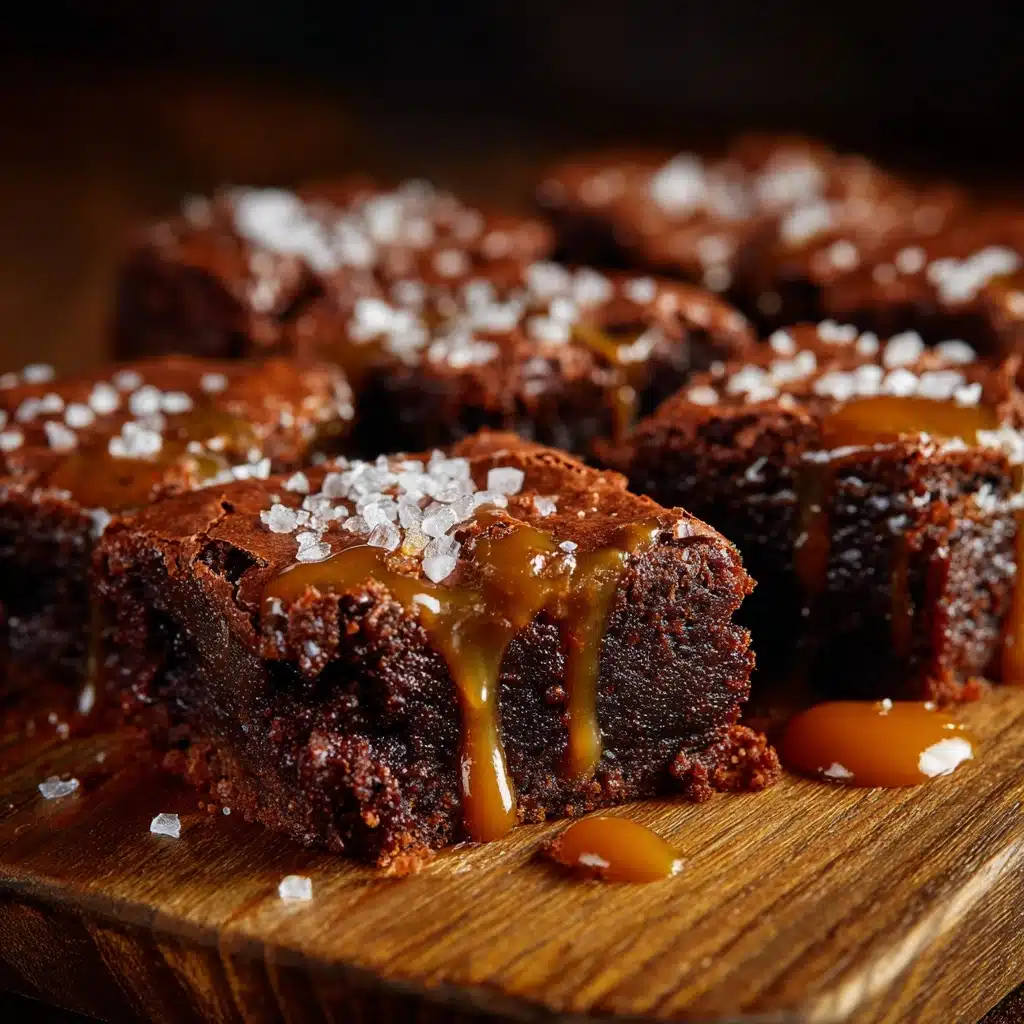
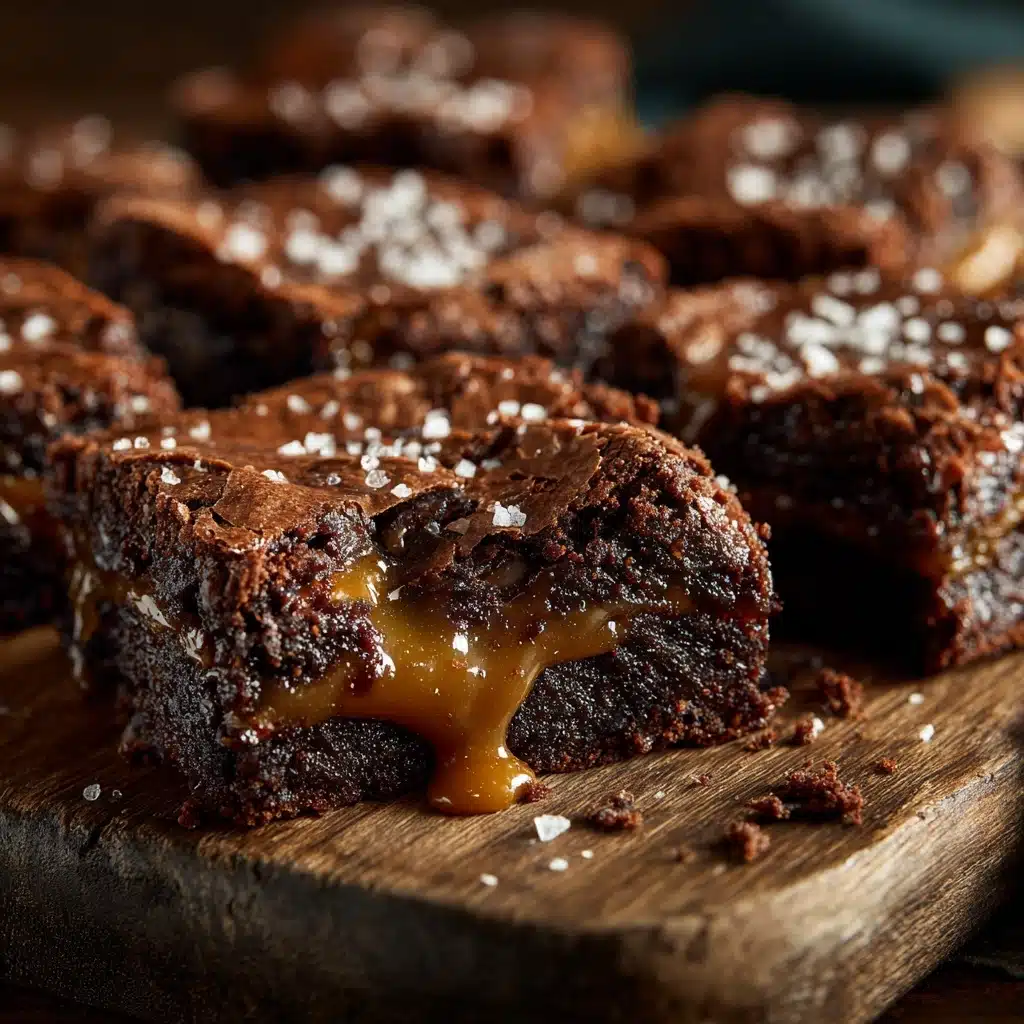
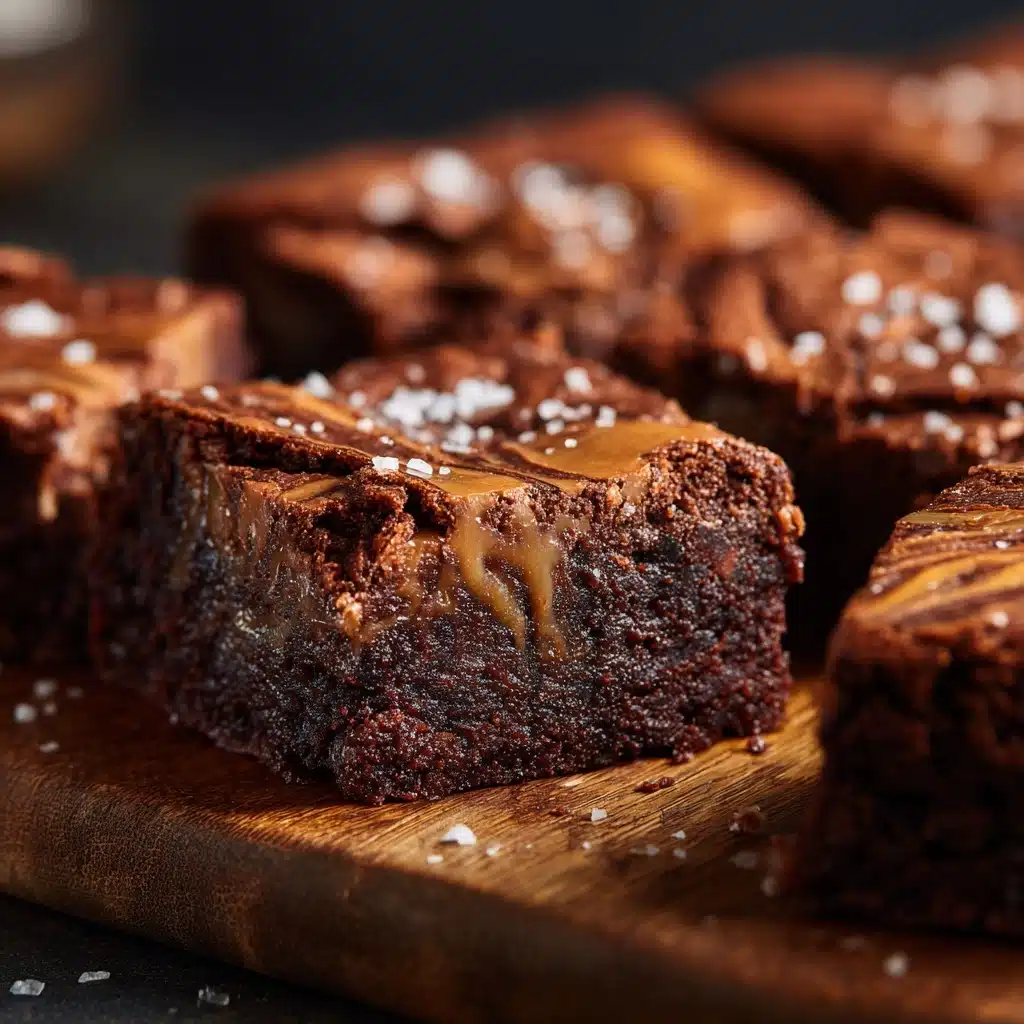
Salted Caramel Brownies Recipe
If you’re craving a decadent dessert that brilliantly balances rich chocolate and buttery sweetness, these Salted Caramel Brownies are your new best friend in the kitchen. Imagine biting into fudgy, dense chocolate brownies swirled with luscious, gooey salted caramel and finished with a sprinkling of flaky sea salt to elevate every flavor note. Each square offers a perfect harmony of sweet and salty that will delight your taste buds and quickly become a favorite for any occasion.
Ingredients You’ll Need
These ingredients are wonderfully simple yet essential to achieve that perfect texture and flavor balance in your Salted Caramel Brownies. Each element plays a special role, from the richness of butter to the sharp hint of sea salt on top.
- 1 cup butter, melted: Provides the rich, smooth fat that makes the brownies fudgy and decadent.
- 1 ½ cups sugar: Sweetens the brownies and helps create that shiny crust on top.
- 3 eggs: Bind the ingredients together and contribute to a soft, moist crumb.
- 1 tsp vanilla extract: Adds a warm, aromatic depth to the chocolate flavor.
- ¾ cup cocoa powder: The heart of the chocolate taste — use good quality for the best results.
- 1 cup flour: The structure that holds these brownies just right, not too cakey, not too dense.
- ½ tsp salt: Enhances the chocolate flavor and works in tandem with the caramel’s sweetness.
- ½ cup caramel sauce: The star swirl that brings gooey, buttery sweetness with a hint of salt.
- Flaky sea salt for garnish: Sprinkled on top to give that satisfying salty crunch and contrast.
How to Make Salted Caramel Brownies
Step 1: Prepare Your Batter
Start by whisking the melted butter, sugar, eggs, and vanilla extract until everything is luxuriously smooth. This creates the perfect base that will hold together all those rich flavors you’re about to add. Don’t rush this step—getting a silky batter means a fudgier brownie.
Step 2: Mix in Your Dry Ingredients
Next, sift in the cocoa powder, flour, and salt directly into your wet mixture. Stir gently until just combined — overmixing can lead to tough brownies, so stop when you no longer see streaks of flour. This is where the magic really begins to take shape with dense, chocolatey goodness.
Step 3: Layer the Batter and Caramel
Pour half of your batter into a lined baking pan and then drizzle half of the caramel sauce over it. Dollop the remaining batter on top and smooth it out. This layering creates those irresistible caramel pockets once baked. A quick swirl with a knife can create a beautiful marbled effect that looks as good as it tastes.
Step 4: Bake Until Set
Bake in a preheated oven at 350°F (175°C) for about 35 minutes, or until the brownies have set but are still slightly soft in the middle. They will firm up as they cool, so don’t overbake — you want that perfect fudgy texture.
Step 5: Add the Finishing Touches
Once cooled, drizzle on the remaining caramel sauce over your brownies and generously sprinkle flaky sea salt over the top. This finishing step enhances the flavors and adds a delightful crunch that makes these Salted Caramel Brownies utterly unforgettable.
How to Serve Salted Caramel Brownies
Garnishes
While flaky sea salt is a classic garnish here, you can also add a dusting of cocoa powder or a few toasted nuts for a bit of textural contrast. A small scoop of vanilla ice cream on the side makes every bite feel like a luxurious treat.
Side Dishes
Serve these brownies with a cup of strong coffee or a rich glass of milk to balance the sweetness. For an elegant touch, pair them with fresh berries or a scoop of homemade whipped cream to lighten the experience.
Creative Ways to Present
Slice your Salted Caramel Brownies into bite-sized squares and arrange them on a decorative platter for parties. You can even layer brownie pieces in a glass with whipped cream and caramel for a quick and impressive dessert parfait.
Make Ahead and Storage
Storing Leftovers
Keep your brownies fresh by storing them in an airtight container at room temperature. They’ll stay moist and flavorful for up to four days, making them an ideal make-ahead treat for busy weeks.
Freezing
If you want to enjoy Salted Caramel Brownies later, freeze them in a single layer on a baking sheet, then transfer to a freezer-safe container or bag. They can be frozen for up to two months without losing their fudgy texture.
Reheating
To bring your brownies back to life after freezing, warm them briefly in the microwave or oven. A quick 10-15 seconds in the microwave will soften them perfectly, or pop them in a 300°F oven for about 5 minutes, just enough to enjoy that gooey caramel again.
FAQs
Can I use homemade caramel sauce for these brownies?
Absolutely! Homemade caramel sauce adds a wonderful personal touch and can be tailored to your preferred saltiness and sweetness levels, perfectly complementing your Salted Caramel Brownies.
What type of cocoa powder works best?
For the richest flavor, use a good quality natural or Dutch-processed cocoa powder. Dutch-processed typically gives a smoother, less bitter taste, which pairs beautifully with the sweet caramel.
Can I substitute butter for oil?
Butter is key for that fudgy texture and rich flavor in these brownies, so it’s best not to substitute it with oil. Butter also helps create the beautiful shiny crust you want on top.
How do I prevent the caramel from sinking too much in the batter?
Pouring half the batter first, then drizzling caramel before adding the rest helps create layers, but a gentle swirl helps keep the caramel nicely distributed without sinking entirely to the bottom.
Are these brownies gluten-free?
The recipe as written uses wheat flour, but you can experiment with gluten-free flour blends to make them suitable for gluten-free diets, though texture might differ slightly.
Final Thoughts
These Salted Caramel Brownies truly are a slice of dessert heaven, combining the best of rich chocolate and buttery caramel with a sprinkle of salt to make every bite unforgettable. Whether you’re baking for a crowd or indulging in a little self-care treat, this recipe is an absolute must-try. So, grab your ingredients and create some magic in your kitchen — you won’t regret it!